<?xml version="1.0" encoding="utf-8"?><feed xmlns="http://www.w3.org/2005/Atom" ><generator uri="https://jekyllrb.com/" version="4.4.1">Jekyll</generator><link href="https://jeffburg.com/feed.xml" rel="self" type="application/atom+xml" /><link href="https://jeffburg.com/" rel="alternate" type="text/html" /><updated>2026-06-17T10:09:21+00:00</updated><id>https://jeffburg.com/feed.xml</id><title type="html">Jeffrey Bergier</title><entry><title type="html">How to Sync iPhone 5 with PowerPC Macs</title><link href="https://jeffburg.com/retro-tech/2026/02/16/Reverse-iTunes-1.html" rel="alternate" type="text/html" title="How to Sync iPhone 5 with PowerPC Macs" /><published>2026-02-16T00:00:00+00:00</published><updated>2026-02-16T00:00:00+00:00</updated><id>https://jeffburg.com/retro-tech/2026/02/16/Reverse-iTunes-1</id><content type="html" xml:base="https://jeffburg.com/retro-tech/2026/02/16/Reverse-iTunes-1.html"><![CDATA[<table>
  <thead>
    <tr>
      <th style="width: 50%;">iMac G4 and iPhone 5</th>
      <th>iTunes Screenshots</th>
    </tr>
  </thead>
  <tbody>
    <tr>
      <td style="vertical-align: top;">
        <a href="/assets/images/retro-tech/reverse-itunes-1/beauty-shot-1.jpeg">
          <img src="/assets/images/retro-tech/reverse-itunes-1/beauty-shot-1-thumb.jpeg" alt="iMac G4 Beauty Shot" style="width: 100%; height: auto;" />
        </a>
      </td>
      <td style="vertical-align: top;">
        <a href="/assets/images/retro-tech/reverse-itunes-1/sync-success-1.png">
          <img src="/assets/images/retro-tech/reverse-itunes-1/sync-success-1-thumb.png" alt="Sync Success 1" />
        </a>
        <a href="/assets/images/retro-tech/reverse-itunes-1/sync-success-2.png">
          <img src="/assets/images/retro-tech/reverse-itunes-1/sync-success-2-thumb.png" alt="Sync Success 2" />
        </a>
      </td>
    </tr>
  </tbody>
</table>

<h2 id="table-of-contents">Table of Contents</h2>

<ul id="markdown-toc">
  <li><a href="#table-of-contents" id="markdown-toc-table-of-contents">Table of Contents</a></li>
  <li><a href="#overview" id="markdown-toc-overview">Overview</a></li>
  <li><a href="#tldr" id="markdown-toc-tldr">TL;DR</a>    <ul>
      <li><a href="#tutorial" id="markdown-toc-tutorial">Tutorial</a></li>
      <li><a href="#caveats" id="markdown-toc-caveats">Caveats</a></li>
    </ul>
  </li>
  <li><a href="#background" id="markdown-toc-background">Background</a>    <ul>
      <li><a href="#but-why" id="markdown-toc-but-why">But Why</a></li>
    </ul>
  </li>
  <li><a href="#approach" id="markdown-toc-approach">Approach</a>    <ul>
      <li><a href="#0-run-itunes-with-gdb" id="markdown-toc-0-run-itunes-with-gdb">0. Run iTunes with GDB</a></li>
      <li><a href="#1-defeat-ptrace" id="markdown-toc-1-defeat-ptrace">1. Defeat PTRACE</a></li>
      <li><a href="#2-inspect-every-string-created" id="markdown-toc-2-inspect-every-string-created">2. Inspect Every String Created</a></li>
      <li><a href="#3-inspect-every-dictionary-created" id="markdown-toc-3-inspect-every-dictionary-created">3. Inspect Every Dictionary Created</a></li>
      <li><a href="#4-failed-use-gdb-to-replace-the-minitunesversion" id="markdown-toc-4-failed-use-gdb-to-replace-the-minitunesversion">4. [Failed] Use GDB to Replace the MinITunesVersion</a></li>
      <li><a href="#5-replace-the-key-directly-in-the-itunes-binary" id="markdown-toc-5-replace-the-key-directly-in-the-itunes-binary">5. Replace the Key Directly in the iTunes Binary</a></li>
      <li><a href="#6-future-work-iphone-artwork" id="markdown-toc-6-future-work-iphone-artwork">6. [Future Work] iPhone Artwork</a></li>
    </ul>
  </li>
</ul>

<h2 id="overview">Overview</h2>

<p>In this article, I will briefly show you how to get an iPhone 5 to sync
with any Mac running Mac OS X 10.5.8, and yes, this includes PowerPC Macs.
Syncing the iPhone 5 with PowerPC Macs was never possible because Apple
restricted the iPhone 5 to Mac OS X 10.6.8 or higher.</p>

<h2 id="tldr">TL;DR</h2>

<p>When the iPhone and iTunes communicate with each other they do a handshake
involving a lot of Property List (PLIST) XML passing. iTunes will start key
exchanges and then the iPhone will send a large PLIST payload that explains the
capabilities of the device such as the supported languages/regions, sync
features, and most importantly the minimum version of iTunes required by this
iPhone. This part of the PLIST is stored in the key “MinITunesVersion.” iTunes
then checks this key and if the value is larger than the current version, iTunes
will display an error saying which version of iTunes is required. What is
most important, is this key is not present when the iPhone 4s and iTunes do
their handshake.</p>

<p>So to bypass this check, all we need to do is change the “MinITunesVersion”
string hardcoded into the iTunes binary to anything else and iTunes will then
check for a key that does not exist in the PLIST XML provided by the iPhone
and then iTunes will happily not display an error and bring you straight to the
normal syncing screen in iTunes.</p>

<h3 id="tutorial">Tutorial</h3>

<ol>
  <li>Download your favorite Binary HEX editor for your PowerPC Mac such as Hex Fiend
(<a href="https://www.macintoshrepository.org/25974-hex-fiend">Macintosh Repository</a>, <a href="https://macintoshgarden.org/apps/hex-fiend">Macintosh Garden</a>)</li>
  <li>In Finder, click Go→Go to Folder and type in <code class="language-plaintext highlighter-rouge">/Applications/iTunes.app/Contents/MacOS</code></li>
  <li>Backup the iTunes binary by right clicking on it and choosing “Compress”</li>
  <li>Open the iTunes binary in the Hex Editor</li>
  <li>Search for the string “MinITunesVersion” (there should only be 1)</li>
  <li>Change it to literally anything else
    <ol>
      <li>I changed mine to “MinITuMesVersion”</li>
    </ol>
  </li>
  <li>Save the changes</li>
  <li>Relaunch iTunes, you’re good to go</li>
</ol>

<p>With this approach, I have been able to sync Apps, Music, Podcasts, iPhoto, and
Videos. Even the feature that allows you to rearrange your home screen from
iTunes works fine.</p>

<h3 id="caveats">Caveats</h3>

<ul>
  <li>This is a hack and may not work properly: hacker beware <i class="fa-solid fa-skull-crossbones"></i></li>
  <li>After performing this hack, iTunes forcefully exits when trying to play
any video. VLC has way better video playback performance so this is not a
problem for me.
    <ul>
      <li>I assume there is some sort of checksum iTunes checks before it tries to 
play video to protect DRM’ed content but I have not tried to troubleshoot 
this yet.</li>
    </ul>
  </li>
  <li>This might work for iPhone 5s and others but I have not tried</li>
  <li>This may not work on newer versions of iOS. I was using iOS 6.1.3 but if your
iPhone 5 is running a newer version, this may not work.
    <ul>
      <li>I confirmed this does not work if the iPhone is running iOS 10. I have not
yet tested in iOS 8.</li>
    </ul>
  </li>
</ul>

<h2 id="background">Background</h2>

<p>You may or may not remember, but when the iPhone 5 was released, its official
minimum system requirement was Mac OS X 10.6.8 Snow Leopard or newer. This of
course ruled out the ability to sync your iPhone 5 with a PowerPC Mac as those
only ran Mac OS X 10.5.8 Leopard at most. Given that Mac OS X 10.6 Snow Leopard
was released in August 2009 and the iPhone 5 was released in 2012, this seems
like a reasonable cutoff, especially in the fast-moving world of technology back
then.</p>

<p>If you Google this problem, you will find that there are many people online
(well, online back in 2012) complaining about this limitation and others
confidently making the <strong>wrong</strong> assertion that this is because of the switch
from the 30-pin dock connector to the lightning connector. However, I was
extremely suspicious of this because when I open iTunes 10.6.3 and plug in the
iPhone 5, iTunes immediately shows a very nice error that says iTunes 10.7 is
required. Furthermore, the iPhone 5 shows up in Xcode! Xcode won’t deploy to the
device because iOS is too new, but it shows up and it can see it’s an iPhone 5
and which iOS version it’s running. So I knew that this lightning issue was not
true; clearly, the iPhone was communicating with the Mac even over lightning.</p>

<p>Given that my iPhone 5 and my iPhone 4s were both running iOS 6.1.3 and one of
them would happily sync with iTunes 10.6.3 one would not, I knew this limitation
was artificial. And so began my first reverse engineering project: Figure out
this artificial limitation and eliminate it.</p>

<h3 id="but-why">But Why</h3>

<p>Why did I spend so much time getting my iMac G4 to sync with an iPhone 5?
The answer is that I want to try to use an iOS 6 iPhone as my main iPhone in</p>
<ol>
  <li>What does that mean? Does that mean I won’t have a backup, modern,
iPhone? No, of course I will. It’s not possible to survive in the world without a
semi-modern mobile phone. But it will be my backup. I only have a few apps I use
on my iPhone and I think I can recreate them for iOS 6 without much issue. But
more on that later.</li>
</ol>

<p>But why not use my iPhone 4s; it’s running iOS 6 as well. Well, the iPhone 5 is
the newest iPhone that can run iOS 6 so the performance is much better and 1GB
of RAM <i class="fa-regular fa-face-surprise"></i> which seems insane to me. But
more important than that, the iPhone 5 has a widescreen display. Given so much
of what I do on the iPhone is YouTube, the lack of widescreen is kind of killer.
Also, the iPhone 5 can join 5GHz WiFi networks and it has a lightning connector.
The lightning connector is so important because they are plentiful and I can
charge anywhere, even in 2026.</p>

<p>For these reasons I wanted to get my iPhone 5 working on my iMac G4 so I have a
full retro sync solution for all of my music, photos, podcasts, etc.</p>

<h2 id="approach">Approach</h2>

<p>At first, I thought the mechanism that prevented syncing with the iPhone 5 was
a whitelist in iTunes or in MobileDevice.framework. However, after many
hours searching both the disk and the iTunes and MobileDevice binaries in
Hopper, I was totally failing to find a whitelist of supported devices 
(Spoiler Alert: There isn’t one). So I had to change techniques, I had to
try to debug iTunes live in GDB.</p>

<p>I had never done disassembly or GDB on an app I didn’t make before. It’s
definitely an interesting process. I used a ton of Gemini to get this done 
(But I assume any AI will work). Gemini can’t think for you. But it can help
you with syntax and with knowing which functions in Core Foundation to set 
breakpoints on. But yeah, it can also totally lead you astray. There were
times when I was outright scolding it to try to get it back on the right path.</p>

<p>In the following few sections, I will walk you through how I defeated the iTunes
version restriction for the iPhone 5. Considering how simple the fix ended up
being, there’s probably a lot of people out there wondering why no one did this 
12 years ago when the iPhone 5 was new (me included).</p>

<h3 id="0-run-itunes-with-gdb">0. Run iTunes with GDB</h3>

<p>I used GDB to launch and debug iTunes. I used custom GDB files to set 
breakpoints and inspect the data flow between the iPhone and iTunes.</p>

<p>In every section below, I will include the GDB file so you get an idea of how
it works. To use the file, use the -x command in GDB.</p>

<p><code class="language-plaintext highlighter-rouge">gdb -x ~/Desktop/myfile.gdb /Applications/iTunes/Content/MacOS/iTunes</code></p>

<h3 id="1-defeat-ptrace">1. Defeat PTRACE</h3>

<p>iTunes operates in a very defensive way. It’s not surprising given this is one
massively complex codebase and it deals with a lot of DRM content, purchasing,
etc. For this reason, iTunes does frequently use <code class="language-plaintext highlighter-rouge">ptrace</code> to check if it’s
connected to a debugger, and if so, it just quits. So the first thing I had to
figure out how to do was bypass this check.</p>

<p>It turns out it’s pretty easy. I set a breakpoint on the <code class="language-plaintext highlighter-rouge">ptrace</code> function and
then forcefully return 0. With that simple trick, it worked. With this in place,
iTunes happily runs while connected to the debugger <i class="fa-solid fa-user-ninja"></i></p>

<pre><code class="language-gdb"># Set a breakpoint on ptrace
break ptrace
commands
  # Optional, tells GDB to not print that the breakpoint was hit
  silent
  # Trick iTunes by forcing ptrace to return 0, no debugger attached
  return 0
  # Automatically continue so that the debugger doesn't pause
  continue
end

# Tells GDB to run the executable after it reads the file
run
</code></pre>

<h3 id="2-inspect-every-string-created">2. Inspect Every String Created</h3>

<p>I had very little to go on at this point, I had already searched the binaries in
Hopper thoroughly and I could not find any hardcoded references to any iPhone
identifiers. I had also exhaustively searched the whole filesystem for
references to iPhone identifiers. I was trying to find the whitelist for
supported devices somewhere, but I just couldn’t find it.</p>

<p>So I dropped down to lowest common denominator in GDB. “What if I just print
every string that iTunes makes and see if I can find the whitelist in there?”
The short answer is I did not find the whitelist, but when observing the strings
flowing through the system, I noticed a lot of XML. Especially after I plugged
in my phone. Perhaps this XML contained something interesting; perhaps indeed 
<i class="fa-regular fa-face-smile-beam"></i></p>

<!-- upgrade fontawesome to get hugging face <i class="fa-brands fa-hugging-face"></i> -->

<pre><code class="language-gdb">break ptrace
commands
  silent
  return 0
  continue
end

# Set a breakpoint on Core Foundation function that creates strings
fb CFStringCreateWithBytes
commands
  # Print register 4 which contains the raw data bytes
  x/s $r4
  continue
end

run
</code></pre>

<h3 id="3-inspect-every-dictionary-created">3. Inspect Every Dictionary Created</h3>

<p>Now that I was seeing XML get passed around, I thought this could be the key.
What is in all of this XML? I decided I would inspect it and see if there was
anything interesting. It turned out to be insanely interesting because once I 
plugged in any iPhone, iTunes and the iPhone would immediately start an
elaborate handshake via property lists. A ton of information was exchanged 
between them. This included the most critical piece!</p>

<p>It turns out that the iPhone was the one telling iTunes which version of iTunes
was required. <strong>THERE WAS NO WHITELIST!</strong> <i class="fa-solid fa-spoon"></i></p>

<blockquote>
  <p>Note this file introduces a new GDB technique that Gemini showed me. When you
start printing all of these strings to the console, the app slows down
significantly. So at the beginning of the file, we set all the breakpoints we
need. Then at the end, we disable the one we don’t want (Breakpoint 2). Then
in a different breakpoint we re-enable that breakpoint.</p>

  <p>With this technique we don’t need to print every XML iTunes creates when it
boots up. Rather, we wait until the iPhone is plugged in <code class="language-plaintext highlighter-rouge">AMDeviceConnect</code> and
then enable the XML printing breakpoint.</p>
</blockquote>

<pre><code class="language-gdb">
break ptrace
commands
  silent
  return 0
  continue
end

# Set a breakpoint on Core Foundation function that 
# creates a dictionary from property list data
fb CFPropertyListCreateFromXMLData
commands
  # Get a pointer to the data (TODO: Is this needed???)
  set $bytes = (char*)CFDataGetBytePtr($r4)
  printf "%s\n", $bytes
  continue
end

# Set a breakpoint on the MobileDevice.framework function that 
# starts the iTunes &lt;-&gt; iPhone Handshake to enable the 
# CFPropertyListCreateFromXMLData breakpoint
fb AMDeviceConnect
commands
  # Re-enable breakpoint on CFPropertyListCreateFromXMLData
  enable 2
  continue
end

# Disable breakpoint on CFPropertyListCreateFromXMLData to improve performance. 
# Once AMDeviceConnect is hit, the breakpoint will be re-enabled
disable 2

run
</code></pre>

<p>The XML is huge, so I won’t put it all in here. But below is a sample, 
including the key we are interested in <code class="language-plaintext highlighter-rouge">MinITunesVersion</code>. Also, if you notice,
it says <code class="language-plaintext highlighter-rouge">MinMacOSVersion</code> is 10.5.8 which means if Apple had released iTunes
10.7 for 10.5.8, it would have worked without hacking. But I suppose what this
means is you might be able to sync with iTunes running on 10.4 if you also 
changed the <code class="language-plaintext highlighter-rouge">MinMacOSVersion</code> key in the iTunes binary. Of course, I have not
tried this so it might not work.</p>

<div class="language-xml highlighter-rouge"><div class="highlight"><pre class="highlight"><code>  <span class="nt">&lt;key&gt;</span>GeniusConfigMaxVersion<span class="nt">&lt;/key&gt;</span>
  <span class="nt">&lt;integer&gt;</span>20<span class="nt">&lt;/integer&gt;</span>
  <span class="nt">&lt;key&gt;</span>GeniusConfigMinVersion<span class="nt">&lt;/key&gt;</span>
  <span class="nt">&lt;integer&gt;</span>1<span class="nt">&lt;/integer&gt;</span>
  <span class="nt">&lt;key&gt;</span>GeniusMetadataMaxVersion<span class="nt">&lt;/key&gt;</span>
  <span class="nt">&lt;integer&gt;</span>20<span class="nt">&lt;/integer&gt;</span>
  <span class="nt">&lt;key&gt;</span>GeniusMetadataMinVersion<span class="nt">&lt;/key&gt;</span>
  <span class="nt">&lt;integer&gt;</span>1<span class="nt">&lt;/integer&gt;</span>
  <span class="nt">&lt;key&gt;</span>GeniusSimilaritiesMaxVersion<span class="nt">&lt;/key&gt;</span>
  <span class="nt">&lt;integer&gt;</span>20<span class="nt">&lt;/integer&gt;</span>
  <span class="nt">&lt;key&gt;</span>GeniusSimilaritiesMinVersion<span class="nt">&lt;/key&gt;</span>
  <span class="nt">&lt;integer&gt;</span>1<span class="nt">&lt;/integer&gt;</span>
  <span class="nt">&lt;key&gt;</span>HomeScreenIconColumns<span class="nt">&lt;/key&gt;</span>
  <span class="nt">&lt;integer&gt;</span>4<span class="nt">&lt;/integer&gt;</span>
  <span class="nt">&lt;key&gt;</span>HomeScreenIconDockMaxCount<span class="nt">&lt;/key&gt;</span>
  <span class="nt">&lt;integer&gt;</span>4<span class="nt">&lt;/integer&gt;</span>
  <span class="nt">&lt;key&gt;</span>HomeScreenIconHeight<span class="nt">&lt;/key&gt;</span>
  <span class="nt">&lt;integer&gt;</span>57<span class="nt">&lt;/integer&gt;</span>
  <span class="nt">&lt;key&gt;</span>HomeScreenIconRows<span class="nt">&lt;/key&gt;</span>
  <span class="nt">&lt;integer&gt;</span>5<span class="nt">&lt;/integer&gt;</span>
  <span class="nt">&lt;key&gt;</span>HomeScreenIconWidth<span class="nt">&lt;/key&gt;</span>
  <span class="nt">&lt;integer&gt;</span>57<span class="nt">&lt;/integer&gt;</span>
  <span class="nt">&lt;key&gt;</span>HomeScreenNewsstand<span class="nt">&lt;/key&gt;</span>
  <span class="nt">&lt;true/&gt;</span>
  <span class="nt">&lt;key&gt;</span>IconFolderColumns<span class="nt">&lt;/key&gt;</span>
  <span class="nt">&lt;integer&gt;</span>4<span class="nt">&lt;/integer&gt;</span>
  <span class="nt">&lt;key&gt;</span>IconFolderMaxPages<span class="nt">&lt;/key&gt;</span>
  <span class="nt">&lt;integer&gt;</span>1<span class="nt">&lt;/integer&gt;</span>
  <span class="nt">&lt;key&gt;</span>IconFolderRows<span class="nt">&lt;/key&gt;</span>
  <span class="nt">&lt;integer&gt;</span>4<span class="nt">&lt;/integer&gt;</span>
  <span class="nt">&lt;key&gt;</span>IconStateSaves<span class="nt">&lt;/key&gt;</span>
  <span class="nt">&lt;true/&gt;</span>
  <span class="nt">&lt;key&gt;</span>KeyTypeSupportVersion<span class="nt">&lt;/key&gt;</span>
  <span class="nt">&lt;integer&gt;</span>492<span class="nt">&lt;/integer&gt;</span>
  <span class="nt">&lt;key&gt;</span>MinITunesVersion<span class="nt">&lt;/key&gt;</span>
  <span class="nt">&lt;string&gt;</span>10.7.0<span class="nt">&lt;/string&gt;</span>
  <span class="nt">&lt;key&gt;</span>MinMacOSVersion<span class="nt">&lt;/key&gt;</span>
  <span class="nt">&lt;string&gt;</span>10.5.8<span class="nt">&lt;/string&gt;</span>
  <span class="nt">&lt;key&gt;</span>NeedsAntiPhishingDB<span class="nt">&lt;/key&gt;</span>
  <span class="nt">&lt;true/&gt;</span>
  <span class="nt">&lt;key&gt;</span>OEMA<span class="nt">&lt;/key&gt;</span>
  <span class="nt">&lt;integer&gt;</span>1<span class="nt">&lt;/integer&gt;</span>
  <span class="nt">&lt;key&gt;</span>OEMID<span class="nt">&lt;/key&gt;</span>
  <span class="nt">&lt;integer&gt;</span>0<span class="nt">&lt;/integer&gt;</span>
  <span class="nt">&lt;key&gt;</span>PhotoEventsSupported<span class="nt">&lt;/key&gt;</span>
  <span class="nt">&lt;true/&gt;</span>
  <span class="nt">&lt;key&gt;</span>PhotoFacesSupported<span class="nt">&lt;/key&gt;</span>
  <span class="nt">&lt;true/&gt;</span>
  <span class="nt">&lt;key&gt;</span>PhotoVideosSupported<span class="nt">&lt;/key&gt;</span>
  <span class="nt">&lt;true/&gt;</span>
  <span class="nt">&lt;key&gt;</span>PlaylistFoldersSupported<span class="nt">&lt;/key&gt;</span>
  <span class="nt">&lt;true/&gt;</span>
  <span class="nt">&lt;key&gt;</span>PodcastsSupported<span class="nt">&lt;/key&gt;</span>
  <span class="nt">&lt;true/&gt;</span>
  <span class="nt">&lt;key&gt;</span>RentalsSupported<span class="nt">&lt;/key&gt;</span>
  <span class="nt">&lt;true/&gt;</span>
  <span class="nt">&lt;key&gt;</span>Ringtones<span class="nt">&lt;/key&gt;</span>
  <span class="nt">&lt;true/&gt;</span>
  <span class="nt">&lt;key&gt;</span>ScreenHeight<span class="nt">&lt;/key&gt;</span>
  <span class="nt">&lt;integer&gt;</span>1136<span class="nt">&lt;/integer&gt;</span>
  <span class="nt">&lt;key&gt;</span>ScreenScaleFactor<span class="nt">&lt;/key&gt;</span>
  <span class="nt">&lt;integer&gt;</span>2<span class="nt">&lt;/integer&gt;</span>
  <span class="nt">&lt;key&gt;</span>ScreenWidth<span class="nt">&lt;/key&gt;</span>
  <span class="nt">&lt;integer&gt;</span>640<span class="nt">&lt;/integer&gt;</span>
  <span class="nt">&lt;key&gt;</span>SupportedKeyboards<span class="nt">&lt;/key&gt;</span>
  <span class="nt">&lt;array&gt;</span>
    <span class="nt">&lt;string&gt;</span>ar<span class="nt">&lt;/string&gt;</span>
    <span class="nt">&lt;string&gt;</span>bg_BG<span class="nt">&lt;/string&gt;</span>
    <span class="nt">&lt;string&gt;</span>bo<span class="nt">&lt;/string&gt;</span>
    <span class="nt">&lt;string&gt;</span>ca_ES<span class="nt">&lt;/string&gt;</span>
    <span class="nt">&lt;string&gt;</span>chr<span class="nt">&lt;/string&gt;</span>
</code></pre></div></div>

<h3 id="4-failed-use-gdb-to-replace-the-minitunesversion">4. [Failed] Use GDB to Replace the MinITunesVersion</h3>

<p>Now that I knew exactly where the XML data was flowing through the system, I
thought I would try to change it in-flight with GDB and iTunes would be none the
wiser. However, this proved to be extremely difficult. Gemini walked me through
all sorts of possibilities. The one I thought would be the most straightforward
was setting a breakpoint on <code class="language-plaintext highlighter-rouge">CFDictionaryGetValue</code> and
<code class="language-plaintext highlighter-rouge">CFDictionaryGetValueIfPresent</code>. I could then check if the key was
<code class="language-plaintext highlighter-rouge">MinITunesVersion</code> and either return <code class="language-plaintext highlighter-rouge">10.6.3</code> or <code class="language-plaintext highlighter-rouge">null</code>. However, this turned
out to be very complex because CFString/NSString are a <a href="https://developer.apple.com/library/archive/documentation/General/Conceptual/CocoaEncyclopedia/ClassClusters/ClassClusters.html">class cluster</a> 
and have many underlying data types. From a developer’s perspective there is no
difference, but when you are in GDB, you need to account for every possibility
in order to compare the string data. Also, if you use a high level compare or
print function like <code class="language-plaintext highlighter-rouge">CFShow</code> or <code class="language-plaintext highlighter-rouge">CFStringCompare</code>, that allocates new memory
and that would cause iTunes to crash randomly as it’s not really safe to do that
in the debugger.</p>

<p>Note that even though the code snippet below is small, at this stage I spent
so many hours with Gemini trying to get a working solution. A solution that
would patch the <code class="language-plaintext highlighter-rouge">MinITunesVersion</code> in flight using GDB.</p>

<pre><code class="language-gdb">
break ptrace
commands
  silent
  return 0
  continue
end

# Set a breakpoint on Core Foundation function that 
# fetches the values from a dictionary using a key
fb CFDictionaryGetValue
commands
  # Even this simple command to print the key would eventually crash iTunes
  call (void)CFShow($r4)
  continue
end

fb AMDeviceConnect
commands
  enable 2
  continue
end

disable 2

run
</code></pre>

<h3 id="5-replace-the-key-directly-in-the-itunes-binary">5. Replace the Key Directly in the iTunes Binary</h3>

<p>It was only when this solution was not working that I started to use 
plain-old-fashioned <code class="language-plaintext highlighter-rouge">grep</code> to search not only the entire filesystem on my
iMac G4 but also on my iPhone 5 for the key <code class="language-plaintext highlighter-rouge">MinITunesVersion</code>. I actually found
several interesting binaries on the iPhone 5 this way, but I have yet to look 
into them.</p>

<p>But on the iMac G4, it of course showed the plain-old iTunes binary contained
this key. That is when I thought, perhaps I can just change the key in binary
and call it a day. Then iTunes would just use the wrong key when querying the
Property List provided by the iPhone. This could of course cause a crash if
the key was required and expected by iTunes. However, I found that when I 
watched the XML handshake between iTunes and my iPhone 4s, that 
<code class="language-plaintext highlighter-rouge">MinITunesVersion</code> was not present. Which meant that iTunes was probably 
considering this key as optional, which meant it was safe to change it 
<i class="fa-solid fa-microscope"></i></p>

<p>And that’s exactly what happened. I opened the iTunes binary in a Hex Editor,
searched for <code class="language-plaintext highlighter-rouge">MinITunesVersion</code> and changed it to <code class="language-plaintext highlighter-rouge">MinITuMesVersion</code> and clicked “Save.”
After relaunching iTunes, I plugged in my iPhone 5 and it just showed up in 
iTunes with no fuss at all. Everything syncs just fine. I couldn’t believe it! 
<i class="fa-regular fa-face-surprise"></i></p>

<p><a href="/assets/images/retro-tech/reverse-itunes-1/hex-1.png"><img src="/assets/images/retro-tech/reverse-itunes-1/hex-1.png" alt="Hex Editor" /></a></p>

<h3 id="6-future-work-iphone-artwork">6. [Future Work] iPhone Artwork</h3>

<p>I want to get the correct artwork showing for the iPhone model in iTunes but
right now it shows a blank. I tried manually installing the artwork files from
iTunes 10.7 but that did not work (it also did not break anything). After doing
some digging in Hopper, it looks like iTunes has a huge function that was
probably code-generated where it selects the images. I tried for a bit to get
it working, but I had to stop as it’s low priority.</p>

<p>But maybe one of these days…</p>

<p><a href="/assets/images/retro-tech/reverse-itunes-1/missing-artwork-1.png"><img src="/assets/images/retro-tech/reverse-itunes-1/missing-artwork-1.png" alt="Missing iPhone Artwork" /></a></p>]]></content><author><name></name></author><category term="Retro-Tech" /><category term="Reverse-Engineer" /><category term="PowerPC" /><category term="iOS" /><category term="Hobby" /><category term="iTunes" /><summary type="html"><![CDATA[Get an iPhone 5 to sync with a Mac running Mac OS X 10.5.8, this was never possible back in the day because Apple restricted the iPhone 5 to syncing only with Mac OS X 10.6.8 or higher.]]></summary></entry><entry><title type="html">How to Develop Original iPhone Apps in 2025</title><link href="https://jeffburg.com/retro-tech/2025/12/09/PPC-iPhone-2.html" rel="alternate" type="text/html" title="How to Develop Original iPhone Apps in 2025" /><published>2025-12-09T00:00:00+00:00</published><updated>2025-12-09T00:00:00+00:00</updated><id>https://jeffburg.com/retro-tech/2025/12/09/PPC-iPhone-2</id><content type="html" xml:base="https://jeffburg.com/retro-tech/2025/12/09/PPC-iPhone-2.html"><![CDATA[<table>
  <thead>
    <tr>
      <th style="width: 50%;">PowerPC Setup</th>
      <th>Xcode Screenshots</th>
    </tr>
  </thead>
  <tbody>
    <tr>
      <td style="vertical-align: top;">
        <a href="/assets/images/retro-tech/ppc-iphone-1/run3.jpeg">
          <img src="/assets/images/retro-tech/ppc-iphone-1/run3-thumb.jpeg" alt="iMac G4 Beauty Shot" style="width: 100%; height: auto;" />
        </a>
      </td>
      <td style="vertical-align: top;">
        <a href="/assets/images/retro-tech/ppc-iphone-1/run2.png">
          <img src="/assets/images/retro-tech/ppc-iphone-1/run2-thumb.png" alt="Xcode Screenshot" />
        </a>
        <a href="/assets/images/retro-tech/ppc-iphone-1/run1.png">
          <img src="/assets/images/retro-tech/ppc-iphone-1/run1-thumb.png" alt="Xcode Screenshot" />
        </a>
      </td>
    </tr>
  </tbody>
</table>

<h2 id="table-of-contents">Table of Contents</h2>

<ul id="markdown-toc">
  <li><a href="#table-of-contents" id="markdown-toc-table-of-contents">Table of Contents</a></li>
  <li><a href="#overview" id="markdown-toc-overview">Overview</a>    <ul>
      <li><a href="#caveats" id="markdown-toc-caveats">Caveats</a></li>
      <li><a href="#approach" id="markdown-toc-approach">Approach</a></li>
      <li><a href="#system-requirements" id="markdown-toc-system-requirements">System Requirements</a></li>
    </ul>
  </li>
  <li><a href="#tutorial-prepare-the-computer-to-sign-iphone-apps-apple-developer-portal" id="markdown-toc-tutorial-prepare-the-computer-to-sign-iphone-apps-apple-developer-portal">Tutorial: Prepare the Computer to Sign iPhone Apps (Apple Developer Portal)</a>    <ul>
      <li><a href="#1-authority-install-the-latest-certificate-authorities-into-your-mac" id="markdown-toc-1-authority-install-the-latest-certificate-authorities-into-your-mac">1. Authority: Install the latest Certificate Authorities into your Mac</a></li>
      <li><a href="#2-certificate-create-iphone-development-signing-certificate" id="markdown-toc-2-certificate-create-iphone-development-signing-certificate">2. Certificate: Create iPhone Development Signing Certificate</a></li>
      <li><a href="#3-identity-create-wildcard-iphone-app-identity" id="markdown-toc-3-identity-create-wildcard-iphone-app-identity">3. Identity: Create Wildcard iPhone App Identity</a></li>
      <li><a href="#4-device-add-iphone-device-to-portal" id="markdown-toc-4-device-add-iphone-device-to-portal">4. Device: Add iPhone Device to Portal</a></li>
      <li><a href="#5-provision-create-provisioning-profile-combines-step-2-3-4" id="markdown-toc-5-provision-create-provisioning-profile-combines-step-2-3-4">5. Provision: Create Provisioning Profile (Combines Step 2, 3, 4)</a></li>
      <li><a href="#6-info-plist-edit-the-infoplist-and-build-settings-of-your-app" id="markdown-toc-6-info-plist-edit-the-infoplist-and-build-settings-of-your-app">6. Info Plist: Edit the Info.plist and Build Settings of Your App</a></li>
    </ul>
  </li>
  <li><a href="#tutorial-prepare-the-iphone-to-ignore-the-signature-jailbreak" id="markdown-toc-tutorial-prepare-the-iphone-to-ignore-the-signature-jailbreak">Tutorial: Prepare the iPhone to Ignore the Signature (Jailbreak)</a>    <ul>
      <li><a href="#1-jailbreak-restore-and-jailbreak-iphone-using-legacy-ios-kit" id="markdown-toc-1-jailbreak-restore-and-jailbreak-iphone-using-legacy-ios-kit">1. Jailbreak: Restore and Jailbreak iPhone using Legacy iOS Kit</a></li>
      <li><a href="#2-cydia-install-the-appsync-tweak-in-cydia" id="markdown-toc-2-cydia-install-the-appsync-tweak-in-cydia">2. Cydia: Install the AppSync Tweak in Cydia</a></li>
      <li><a href="#3-provision-install-the-provisioning-profile-on-device" id="markdown-toc-3-provision-install-the-provisioning-profile-on-device">3. Provision: Install the Provisioning Profile on Device</a></li>
      <li><a href="#4-run-run-app-on-device" id="markdown-toc-4-run-run-app-on-device">4. Run: Run App on Device</a></li>
    </ul>
  </li>
  <li><a href="#congratulations" id="markdown-toc-congratulations">Congratulations!</a></li>
</ul>

<h2 id="overview">Overview</h2>

<p>In this article we will cover how to deploy apps from Xcode to an original
iPhone running iPhone OS 2 or 3 in 2025. This will also work with iPhone 3G,
iPod Touch (1st Generation), iPod Touch (2nd Generation). This is the 2nd
article in the <a href="../04/PPC-iPhone-1.html">"Enabling iPhone Development for PowerPC Macs"</a>
series but this no longer requires a PowerPC Mac. You can use any Mac running
10.7, 10.6, or 10.5 that has Xcode 3 or 4 with the iPhone SDK installed,
including a Virtual Machine (if you still have an Intel Mac).</p>

<p>There are a lot of fiddly steps, but I think it’s important to remember that this
is no different than what every iPhone developer had to do back in 2008. Now
Xcode has been enhanced so much that it’s all done for you. But back then, these
were totally normal steps.</p>

<h3 id="caveats">Caveats</h3>

<ul>
  <li>This requires an Apple Developer account (I am unsure if a free one will work 
or not)</li>
  <li>This requires a Jailbroken iPhone or iPod Touch</li>
</ul>

<p>I think it is possible to do this without a developer account. I found a 
<a href="https://stackoverflow.com/a/10763454">StackOverflow post</a> covering how to do 
it. However, they all require the use of a jailbreak tool called 
<a href="https://cydia.saurik.com/codesign.html"><code class="language-plaintext highlighter-rouge">ldid</code></a>. I have not been able to find 
a copy of <code class="language-plaintext highlighter-rouge">ldid</code> compiled for PowerPC Macs. It might be possible to 
<a href="https://github.com/ProcursusTeam/ldid?tab=readme-ov-file">build from source</a>, 
but I have not tried.</p>

<h3 id="approach">Approach</h3>

<p>We are going to prepare Xcode to sign iPhone apps using the Apple Developer
Portal. Then we are going to prepare the iPhone to ignore the signature via
Jailbreak. This approach seems strange, but there are 2 sides of the equation.
Xcode will not complete the build process for iPhone apps that are intended for
the device without proper signatures. But then, these old iPhone OSes are so out
of date that they no longer contain valid Certificate Authorities to trust those
signatures, resulting in them refusing to launch the signed apps, thus requiring
the Jailbreak.</p>

<p>In this tutorial we are going to be basically living in the “Organizer” in Xcode</p>
<ol>
  <li>Modern Xcode also has a window called Organizer, but it is significantly
different now. So you may want to check out 
<a href="https://archive.org/details/professional-xcode-3/page/616/mode/2up">"Professional Xcode: Chapter 22 Using the Organizer"</a>
on Archive.org to read more about Organizer. It actually has many capabilities
you would not expect such as capturing screenshots from the device. The book
also covers <a href="https://archive.org/details/professional-xcode-3/page/628/mode/2up">provisioning your iPhone</a>,
admittedly in less detail than this tutorial.</li>
</ol>

<h4 id="prepare-the-computer-to-sign-iphone-apps-apple-developer-portal">Prepare the Computer to Sign iPhone Apps (Apple Developer Portal)</h4>

<ol>
  <li><strong>Authority:</strong> Install the latest Certificate Authorities into your Mac</li>
  <li><strong>Certificate:</strong> Create iPhone Development Signing Certificate</li>
  <li><strong>Identity:</strong> Create Wildcard iPhone App Identity</li>
  <li><strong>Device:</strong> Add iPhone Device to Portal</li>
  <li><strong>Provision:</strong> Create Provisioning Profile (Combines Step 2, 3, 4)</li>
  <li><strong>Info Plist:</strong> Edit the Info.plist and Build Settings of Your App</li>
</ol>

<h4 id="prepare-the-iphone-to-ignore-the-signature-jailbreak">Prepare the iPhone to Ignore the Signature (Jailbreak)</h4>

<ol>
  <li><strong>Jailbreak:</strong> Restore and Jailbreak iPhone using <a href="https://github.com/LukeZGD/Legacy-iOS-Kit#">Legacy iOS Kit</a></li>
  <li><strong>Cydia:</strong> Install the AppSync Tweak in Cydia</li>
  <li><strong>Provision:</strong> Install the Provisioning Profile on Device</li>
  <li><strong>Run:</strong> Run App on Device</li>
</ol>

<p>If anyone has advice on how to either not require the developer account to get
Xcode to deploy without a proper signing certificate OR anyone knows how to get
the iPhone to launch the properly signed app without Jailbreak, please let me
know, so I can enhance the tutorial. I think it is frustrating to BOTH need a 
developer account AND need a jailbreak. It should be one or the other, not both.</p>

<h3 id="system-requirements">System Requirements</h3>

<ul>
  <li>A Mac or Virtual Machine that is running Mac OS X 10.7, 10.6, or 10.5</li>
  <li>A Mac with USB 2.0 (it might work with USB 1.1 but no promises)</li>
  <li>Xcode 4.X.X, 3.2.X, or 3.1.4 (The screenshots in this article are for Xcode 3)</li>
  <li>Original iPhone, iPhone 3G, iPod Touch (1st Generation), iPod Touch 
(2nd Generation)</li>
  <li>Device running iPhone OS software 3.1.3 or lower
    <ul>
      <li>These devices can easily be downgraded using <a href="https://github.com/LukeZGD/Legacy-iOS-Kit">Legacy iOS Kit</a></li>
      <li>Legacy iOS Kit requires an Intel or Apple Silicon Mac or a Linux computer</li>
    </ul>
  </li>
</ul>

<h2 id="tutorial-prepare-the-computer-to-sign-iphone-apps-apple-developer-portal">Tutorial: Prepare the Computer to Sign iPhone Apps (Apple Developer Portal)</h2>

<h3 id="1-authority-install-the-latest-certificate-authorities-into-your-mac">1. Authority: Install the latest Certificate Authorities into your Mac</h3>

<p>Before any of this will work, we need to make sure your ancient version of
Mac OS X is loaded with the latest Apple Certificate Authorities and 
Intermediate Certificates that Apple uses for signing its development
certificates.</p>

<table>
  <thead>
    <tr>
      <th>Apple PKI</th>
      <th>Open Panel</th>
    </tr>
  </thead>
  <tbody>
    <tr>
      <td><a href="/assets/images/retro-tech/ppc-iphone-2/auth1.png"><img src="/assets/images/retro-tech/ppc-iphone-2/auth1-thumb.png" alt="Apple PKI Page" /></a></td>
      <td><a href="/assets/images/retro-tech/ppc-iphone-2/auth2.png"><img src="/assets/images/retro-tech/ppc-iphone-2/auth2-thumb.png" alt="Apple PKI Page" /></a></td>
    </tr>
  </tbody>
</table>

<ol>
  <li>Open <a href="https://www.apple.com/certificateauthority/">Apple’s PKI page</a></li>
  <li>Download the following certificate files. Depending on your browser you may 
need to hold the Option key while clicking on them to download the certificate
files.
    <ol>
      <li>“Apple Inc. Root”</li>
      <li>“Apple Root CA - G2 Root”</li>
      <li>“Apple Root CA - G3 Root”</li>
    </ol>
  </li>
  <li>Double click on them one by one. In the Keychain Access open panel, it will 
give you a choice of which keychain to add them to. Choose the System 
keychain, not the Login keychain.</li>
  <li>Now do the same for the World Wide Developer Relations intermediate certificates.
    <ol>
      <li>Worldwide Developer Relations - G2</li>
      <li>Worldwide Developer Relations - G3</li>
      <li>Worldwide Developer Relations - G4</li>
      <li>Worldwide Developer Relations - G5</li>
      <li>Worldwide Developer Relations - G6</li>
    </ol>
  </li>
</ol>

<p>Now your Mac should trust the certificates issued by Apple.</p>

<h3 id="2-certificate-create-iphone-development-signing-certificate">2. Certificate: Create iPhone Development Signing Certificate</h3>

<p>This is the most tedious part. You should probably make a folder on your system
for storing all of the output of this step, so you can zip it all up at the end
as a backup. This should all be possible on your Vintage Mac via AquaFox
(PowerPC) or ArcticFox (Intel), but I chose to use my modern Mac to do all of
the Apple Portal stuff. This means I needed to transfer files back and
forth between the old system and the new system.</p>

<h4 id="a-make-your-certificate-signing-request">A. Make Your Certificate Signing Request</h4>

<table>
  <thead>
    <tr>
      <th>Select Apple CA</th>
      <th>Certificate Signing Request</th>
    </tr>
  </thead>
  <tbody>
    <tr>
      <td><a href="/assets/images/retro-tech/ppc-iphone-2/cert1.png"><img src="/assets/images/retro-tech/ppc-iphone-2/cert1-thumb.png" alt="Keychain" /></a></td>
      <td><a href="/assets/images/retro-tech/ppc-iphone-2/cert2.png"><img src="/assets/images/retro-tech/ppc-iphone-2/cert2-thumb.png" alt="CSR" /></a></td>
    </tr>
  </tbody>
</table>

<p>Follow the <a href="https://developer.apple.com/help/account/certificates/create-a-certificate-signing-request/">instructions on this page</a> 
to make a Certificate Signing Request. Note that these instructions did not work
for me at first. The Assistant said it had made my request and saved it to the
Desktop, but it had not. To resolve this, I went into the System keychain and
selected the Apple Root CA before starting the Assistant. I am not sure if
it matters which certificate you select, but it seems like you need to select
something first.</p>

<p>The way I could tell that it was going to work is the assistant had the
checkbox in the UI that says “Let me specify key pair information”. When that
checkbox was present, then the assistant would actually make the Certificate
Signing Request file.</p>

<h4 id="b-make-a-signing-certificate">B. Make a Signing Certificate</h4>

<table>
  <thead>
    <tr>
      <th>Prompt 1</th>
      <th>Prompt 2</th>
      <th>Certificate Download</th>
    </tr>
  </thead>
  <tbody>
    <tr>
      <td><a href="/assets/images/retro-tech/ppc-iphone-2/cert3.png"><img src="/assets/images/retro-tech/ppc-iphone-2/cert3-thumb.png" alt="Prompt 1" /></a></td>
      <td><a href="/assets/images/retro-tech/ppc-iphone-2/cert4.png"><img src="/assets/images/retro-tech/ppc-iphone-2/cert4-thumb.png" alt="Prompt 2" /></a></td>
      <td><a href="/assets/images/retro-tech/ppc-iphone-2/cert5.png"><img src="/assets/images/retro-tech/ppc-iphone-2/cert5-thumb.png" alt="Prompt 2" /></a></td>
    </tr>
  </tbody>
</table>

<ol>
  <li>Open <a href="https://developer.apple.com/account/resources/certificates/list">Apple Developer Portal - Certificates</a> and click the + button next to Certificates</li>
  <li>Follow the prompts, all the default options are fine</li>
  <li>Download the certificate when you get to the end</li>
</ol>

<h4 id="c-add-the-signing-certificate-to-the-keychain">C. Add the Signing Certificate to the Keychain</h4>

<table>
  <thead>
    <tr>
      <th>All Items</th>
      <th>My Certificates</th>
    </tr>
  </thead>
  <tbody>
    <tr>
      <td><a href="/assets/images/retro-tech/ppc-iphone-2/cert6.png"><img src="/assets/images/retro-tech/ppc-iphone-2/cert6-thumb.png" alt="All Items" /></a></td>
      <td><a href="/assets/images/retro-tech/ppc-iphone-2/cert7.png"><img src="/assets/images/retro-tech/ppc-iphone-2/cert7-thumb.png" alt="My Certificates" /></a></td>
    </tr>
  </tbody>
</table>

<p>Double click to add the Signing Certificate to the Login keychain. Note
that the Signing Certificate MUST appear in the “My Certificates” section of
Keychain Access. If you see it in the “All Items” section but not in the 
“My Certificates” section, then Xcode will not properly see it.</p>

<p>This happened to me and I used Gemini to help me fix it. You can see
<a href="/assets/images/retro-tech/ppc-iphone-2/cert8.png">the full conversation here</a>, 
but the summary is that you need to export the private key as a P12 file, 
then delete all 3 certificates from Keychain, then re-add the P12 file and then
re-add the Signing Certificate. That did it for me. I have no idea why.</p>

<h3 id="3-identity-create-wildcard-iphone-app-identity">3. Identity: Create Wildcard iPhone App Identity</h3>

<table>
  <thead>
    <tr>
      <th>Prompt 1</th>
      <th>Prompt 2</th>
      <th>Prompt 3</th>
      <th>Prompt 4</th>
    </tr>
  </thead>
  <tbody>
    <tr>
      <td><a href="/assets/images/retro-tech/ppc-iphone-2/ident1.png"><img src="/assets/images/retro-tech/ppc-iphone-2/ident1-thumb.png" alt="Prompt 1" /></a></td>
      <td><a href="/assets/images/retro-tech/ppc-iphone-2/ident2.png"><img src="/assets/images/retro-tech/ppc-iphone-2/ident2-thumb.png" alt="Prompt 1" /></a></td>
      <td><a href="/assets/images/retro-tech/ppc-iphone-2/ident3.png"><img src="/assets/images/retro-tech/ppc-iphone-2/ident3-thumb.png" alt="Prompt 1" /></a></td>
      <td><a href="/assets/images/retro-tech/ppc-iphone-2/ident4.png"><img src="/assets/images/retro-tech/ppc-iphone-2/ident4-thumb.png" alt="Prompt 1" /></a></td>
    </tr>
  </tbody>
</table>

<p>Now you are going to create a “wildcard” App Identity. Wildcard means we just 
need to specify the base part of the bundle identifier and the part where the
app name goes is just an *. If you are an iOS developer, you may already have
an established base name. But if not, you can just use the Bonjour name of the
Mac you are running Xcode on. I will do that and so it will be
<code class="language-plaintext highlighter-rouge">local.IchigoDaifuku.*</code>. You will need to type this name into the Info.plist
of every App you make, so make it something easy to remember.</p>

<ol>
  <li>Open <a href="https://developer.apple.com/account/resources/identifiers/list">Apple Developer Portal - Identifiers</a> and click the + button next to Identifiers</li>
  <li>Follow the prompts, all the default options are fine</li>
  <li>When it asks you for the bundle identifier click the “Wildcard” radio button 
and type in your identifier</li>
  <li>Click “Register”</li>
  <li>There is nothing to download in this step, so you can move to the next step</li>
</ol>

<h3 id="4-device-add-iphone-device-to-portal">4. Device: Add iPhone Device to Portal</h3>

<table>
  <thead>
    <tr>
      <th>Device Error</th>
      <th>Copy Device ID</th>
      <th>Developer Portal</th>
    </tr>
  </thead>
  <tbody>
    <tr>
      <td><a href="/assets/images/retro-tech/ppc-iphone-2/device1.png"><img src="/assets/images/retro-tech/ppc-iphone-2/device1-thumb.png" alt="Device Error" /></a></td>
      <td><a href="/assets/images/retro-tech/ppc-iphone-2/device2.png"><img src="/assets/images/retro-tech/ppc-iphone-2/device2-thumb.png" alt="Copy Device ID" /></a></td>
      <td><a href="/assets/images/retro-tech/ppc-iphone-2/device3.png"><img src="/assets/images/retro-tech/ppc-iphone-2/device3-thumb.png" alt="Developer Portal" /></a></td>
    </tr>
  </tbody>
</table>

<p>Now you are going to add your device to the Apple Developer Portal so that we
can generate a provisioning profile in the next step.</p>

<ol>
  <li>In Xcode, choose Window→Organizer and then plug in your device</li>
  <li>If you see the Device Error above, then this version of Xcode is not 
compatible with your device or the OS that’s installed on it.</li>
  <li>Right click on the device name in the side bar and choose “Copy Device 
Identifier”</li>
  <li>Open <a href="https://developer.apple.com/account/resources/devices/list">Apple Developer Portal - Devices</a> and click the + button next to Devices</li>
  <li>Go through the prompts and paste in the Device ID when requested</li>
  <li>There is nothing to download after this step, so you can move on to 
provisioning</li>
</ol>

<p>If you got the error above that your device is not compatible, please verify
your device version, the software version, and the Xcode version. These all
need to be compatible to move on. If it’s an iPhone 4 or lower, then the device
software can easily be downgraded via <a href="https://github.com/LukeZGD/Legacy-iOS-Kit#">Legacy iOS Kit</a>.</p>

<h3 id="5-provision-create-provisioning-profile-combines-step-2-3-4">5. Provision: Create Provisioning Profile (Combines Step 2, 3, 4)</h3>

<table>
  <thead>
    <tr>
      <th>Prompt 1</th>
      <th>Prompt 2</th>
      <th>Prompt 3</th>
      <th>Prompt 4</th>
      <th>Prompt 5</th>
      <th>Prompt 6</th>
      <th>Organizer</th>
    </tr>
  </thead>
  <tbody>
    <tr>
      <td><a href="/assets/images/retro-tech/ppc-iphone-2/profile1.png"><img src="/assets/images/retro-tech/ppc-iphone-2/profile1-thumb.png" alt="Prompt 1" /></a></td>
      <td><a href="/assets/images/retro-tech/ppc-iphone-2/profile2.png"><img src="/assets/images/retro-tech/ppc-iphone-2/profile2-thumb.png" alt="Prompt 2" /></a></td>
      <td><a href="/assets/images/retro-tech/ppc-iphone-2/profile3.png"><img src="/assets/images/retro-tech/ppc-iphone-2/profile3-thumb.png" alt="Prompt 3" /></a></td>
      <td><a href="/assets/images/retro-tech/ppc-iphone-2/profile4.png"><img src="/assets/images/retro-tech/ppc-iphone-2/profile4-thumb.png" alt="Prompt 4" /></a></td>
      <td><a href="/assets/images/retro-tech/ppc-iphone-2/profile5.png"><img src="/assets/images/retro-tech/ppc-iphone-2/profile5-thumb.png" alt="Prompt 5" /></a></td>
      <td><a href="/assets/images/retro-tech/ppc-iphone-2/profile6.png"><img src="/assets/images/retro-tech/ppc-iphone-2/profile6-thumb.png" alt="Prompt 6" /></a></td>
      <td><a href="/assets/images/retro-tech/ppc-iphone-2/profile7.png"><img src="/assets/images/retro-tech/ppc-iphone-2/profile7-thumb.png" alt="Organizer" /></a></td>
    </tr>
  </tbody>
</table>

<p>Now you are going to create the provisioning profile. This step combines the
signing certificate (Step 2), the app identifier (Step 3), and the device
identifier (Step 4) into the final step. Please be very careful when going
through the prompts on the Apple Developer Portal as any mistake will make the 
provisioning profile invalid.</p>

<ol>
  <li><strong>Open</strong> <a href="https://developer.apple.com/account/resources/profiles/list">Apple Developer Portal - Profiles</a> and click the + button next to Profiles</li>
  <li><strong>Prompt 1:</strong> Choose “iOS App Development”</li>
  <li><strong>Prompt 2:</strong> Choose the App Identifier you made in Step 3</li>
  <li><strong>Prompt 3:</strong> Choose the Certificate you made in Step 2. The names can be 
pretty vague but I think the bottom one is the newest</li>
  <li><strong>Prompt 4:</strong> Choose the Device you added in Step 4</li>
  <li><strong>Prompt 5:</strong> Give the Profile a name</li>
  <li><strong>Prompt 6:</strong> Download the provisioning profile</li>
  <li><strong>Organizer:</strong> In Xcode, choose Window→Organizer. In the sidebar, select 
Provisioning Profiles and then drag the profile from the Finder into the 
Organizer</li>
  <li>Now you can ZIP up all of the uploads and downloads created during this part 
of the tutorial for safe-keeping, in case they are ever needed again</li>
</ol>

<h3 id="6-info-plist-edit-the-infoplist-and-build-settings-of-your-app">6. Info Plist: Edit the Info.plist and Build Settings of Your App</h3>

<table>
  <thead>
    <tr>
      <th>Info.plist</th>
      <th>Build Settings 1</th>
      <th>Build Settings 2</th>
      <th>Build and Go</th>
      <th>No Device Error</th>
    </tr>
  </thead>
  <tbody>
    <tr>
      <td><a href="/assets/images/retro-tech/ppc-iphone-2/info1.png"><img src="/assets/images/retro-tech/ppc-iphone-2/info1-thumb.png" alt="Info.plist" /></a></td>
      <td><a href="/assets/images/retro-tech/ppc-iphone-2/info2.png"><img src="/assets/images/retro-tech/ppc-iphone-2/info2-thumb.png" alt="Build Settings 1" /></a></td>
      <td><a href="/assets/images/retro-tech/ppc-iphone-2/info3.png"><img src="/assets/images/retro-tech/ppc-iphone-2/info3-thumb.png" alt="Build Settings 2" /></a></td>
      <td><a href="/assets/images/retro-tech/ppc-iphone-2/info4.png"><img src="/assets/images/retro-tech/ppc-iphone-2/info4-thumb.png" alt="Build and Go" /></a></td>
      <td><a href="/assets/images/retro-tech/ppc-iphone-2/info5.png"><img src="/assets/images/retro-tech/ppc-iphone-2/info5-thumb.png" alt="No Device Error" /></a></td>
    </tr>
  </tbody>
</table>

<p>Now you are going to edit the Info.plist and the build settings of your 
application. If you don’t have an application, you can just create one from the
templates under File→New Project. And yes, you will need to do this any time
you create a new application project.</p>

<ol>
  <li>In Xcode, open Info.plist and change the bundle identifier to match Step 3. 
Type Command + S to save the file</li>
  <li>Open the Build Settings by selecting the project file at the top of the 
Groups &amp; Files pane and then click on Info in the toolbar</li>
  <li>In the info panel click on the Build tab and then make sure the Configuration
and Show dropdowns say “All”</li>
  <li>In the Build Settings panel, look for Code Signing Identity, and choose the 
provisioning profile you created in Step 5 and then close the info panel</li>
  <li>Make sure there is no device connected, then choose Device from the Overview 
dropdown and then click Build and Go</li>
  <li>At this point you might see a Keychain access permission, choose “Always 
Allow”</li>
  <li>Lastly you should see an error appear that says “No provisioned iPhone OS 
device is connected”</li>
</ol>

<p>If you receive the “No provisioned iPhone OS device is connected” error, you
have succeeded, congratulations! You have just gone through the really tedious
task that Apple created for all iPhone developers back in 2008. Now Xcode is 100%
ready to deploy your custom Apps to a real iPhone!</p>

<p>If you see a different error, like a build or signing error, then you have a 
different problem that you need to troubleshoot before you can move on.</p>

<h2 id="tutorial-prepare-the-iphone-to-ignore-the-signature-jailbreak">Tutorial: Prepare the iPhone to Ignore the Signature (Jailbreak)</h2>

<p>This is the part of the tutorial that an iPhone Developer would not have had to
do in 2008. I am not quite sure the reason, but iPhone OS 3.1.3 no longer trusts
the signature we just worked so hard to enable in Xcode. Yes, we had to do it
because Xcode will not deploy Apps to a device without a valid signature. But if
you try to plug in your device and deploy to it right now, you will get an error
telling you that the app could not be installed because there were certificate
issues and it suggests checking the date and time on the phone. I think what
has happened is the Certificate Authorities that Apple used in 2008 have expired
since then and are no longer valid. I tried installing the CAs from Step 1
of this tutorial on the Phone, but I still got the same error.</p>

<p>It’s OK though, because honestly, these old devices are pretty much bricks
without a Jailbreak. Also, jailbreaking is so incredibly easy now thanks
to <a href="https://github.com/LukeZGD/Legacy-iOS-Kit#">Legacy iOS Kit</a> by LukeZGD. 
If you use this tool successfully, you should definitely 
<a href="https://ko-fi.com/lukezgd">buy him a Coffee</a> because the script is amazing!
It even helps you enter DFU mode with exactly timed instructions.</p>

<h3 id="1-jailbreak-restore-and-jailbreak-iphone-using-legacy-ios-kit">1. Jailbreak: Restore and Jailbreak iPhone using Legacy iOS Kit</h3>

<table>
  <thead>
    <tr>
      <th>Main Menu</th>
      <th>Select OS</th>
      <th>Download IPSW</th>
      <th>Start Restore</th>
      <th>Restore</th>
    </tr>
  </thead>
  <tbody>
    <tr>
      <td><a href="/assets/images/retro-tech/ppc-iphone-2/jail1.png"><img src="/assets/images/retro-tech/ppc-iphone-2/jail1-thumb.png" alt="Main Menu" /></a></td>
      <td><a href="/assets/images/retro-tech/ppc-iphone-2/jail2.png"><img src="/assets/images/retro-tech/ppc-iphone-2/jail2-thumb.png" alt="Select OS" /></a></td>
      <td><a href="/assets/images/retro-tech/ppc-iphone-2/jail3.png"><img src="/assets/images/retro-tech/ppc-iphone-2/jail3-thumb.png" alt="Download IPSW" /></a></td>
      <td><a href="/assets/images/retro-tech/ppc-iphone-2/jail4.png"><img src="/assets/images/retro-tech/ppc-iphone-2/jail4-thumb.png" alt="Start Restore" /></a></td>
      <td><a href="/assets/images/retro-tech/ppc-iphone-2/jail5.png"><img src="/assets/images/retro-tech/ppc-iphone-2/jail5-thumb.png" alt="Restore" /></a></td>
    </tr>
  </tbody>
</table>

<p>I will provide the instructions for performing a Restore and Jailbreak which
will erase everything on the device. However, if your device is a time capsule,
and you do not want to erase it, I totally understand. 
<a href="https://github.com/LukeZGD/Legacy-iOS-Kit#">Legacy iOS Kit</a> can also just 
jailbreak it for you. Please see the <a href="https://github.com/LukeZGD/Legacy-iOS-Kit/wiki/Jailbreaking-with-Legacy-iOS-Kit">documentation</a>.</p>

<ol>
  <li>On a modern-ish Intel or Apple Silicon Mac, open Terminal: <code class="language-plaintext highlighter-rouge">cd Downloads</code></li>
  <li>Clone Legacy iOS Kit: <code class="language-plaintext highlighter-rouge">git clone https://github.com/LukeZGD/Legacy-iOS-Kit.git</code></li>
  <li>CD into the Directory: <code class="language-plaintext highlighter-rouge">cd Legacy-iOS-Kit</code></li>
  <li>Run the setup script: <code class="language-plaintext highlighter-rouge">./restore.sh</code></li>
  <li>Plug in your device and then run the script again: <code class="language-plaintext highlighter-rouge">./restore.sh</code></li>
  <li>Follow the onscreen prompts to Restore
    <ol>
      <li>Please read the prompts carefully and see the screenshots above for a full
visual walkthrough</li>
      <li>Note that the script will offer to download the latest version of the OS
for you, but if you want to select your own version you can download it 
from <a href="https://ipsw.me">IPSW.me</a></li>
    </ol>
  </li>
</ol>

<p>The device should now be restored and jailbroken. If you can’t unlock it
(meaning it is stuck at the slider that says Slide for Emergency), then run
the script again and it will have an option to attempt activation. If there is
a SIM card in the device, this should work without the Hacktivate option. But
sometimes you have to try the “lighter” activation thing 2 or 3 times.</p>

<h3 id="2-cydia-install-the-appsync-tweak-in-cydia">2. Cydia: Install the AppSync Tweak in Cydia</h3>

<table>
  <thead>
    <tr>
      <th>Add Source</th>
      <th>Install 1</th>
      <th>Install 2</th>
      <th>Install 3</th>
      <th>Install 4</th>
      <th>Install 5</th>
    </tr>
  </thead>
  <tbody>
    <tr>
      <td><a href="/assets/images/retro-tech/ppc-iphone-2/cydia1.png"><img src="/assets/images/retro-tech/ppc-iphone-2/cydia1-thumb.png" alt="Add Source" /></a></td>
      <td><a href="/assets/images/retro-tech/ppc-iphone-2/cydia2.png"><img src="/assets/images/retro-tech/ppc-iphone-2/cydia2-thumb.png" alt="Install 1" /></a></td>
      <td><a href="/assets/images/retro-tech/ppc-iphone-2/cydia3.png"><img src="/assets/images/retro-tech/ppc-iphone-2/cydia3-thumb.png" alt="Install 2" /></a></td>
      <td><a href="/assets/images/retro-tech/ppc-iphone-2/cydia4.png"><img src="/assets/images/retro-tech/ppc-iphone-2/cydia4-thumb.png" alt="Install 3" /></a></td>
      <td><a href="/assets/images/retro-tech/ppc-iphone-2/cydia5.png"><img src="/assets/images/retro-tech/ppc-iphone-2/cydia5-thumb.png" alt="Install 4" /></a></td>
      <td><a href="/assets/images/retro-tech/ppc-iphone-2/cydia6.png"><img src="/assets/images/retro-tech/ppc-iphone-2/cydia6-thumb.png" alt="Install 5" /></a></td>
    </tr>
  </tbody>
</table>

<p>Now you will be installing a special Tweak for the iPhone called AppSync. This
Tweak will prevent the process called <code class="language-plaintext highlighter-rouge">installd</code> from checking for signatures
when Apps are installed. This is critical to installing apps from iTunes,
Xcode, or even Legacy iOS Kit as this one process checks all of them for a 
valid signature before installing.</p>

<p>There is a different version of AppSync for different iOS versions, so see the
<a href="https://github.com/LukeZGD/Legacy-iOS-Kit/wiki/Install-IPA-AppSync">Legacy iOS Kit Documentation</a> 
for full details. In this tutorial, I will be showing this for iPhone OS 3.1.3.</p>

<ol>
  <li><strong>Open Cydia:</strong> On first launch, Cydia may need to do a 1-time-setup and then
restart</li>
  <li><strong>Show Sources:</strong> Tap on the Sources tab and wait for it to refresh (it could
take a while)</li>
  <li><strong>(Optional) Delete Bad Sources:</strong> For sources that failed to refresh, delete
them. They will have no icon and if you tap on them, they will have no 
packages</li>
  <li><strong>Add Source:</strong> Tap the “Edit” button at the top right and then tap “Add” at 
the top left and type <code class="language-plaintext highlighter-rouge">http://ios3.party</code></li>
  <li><strong>Install AppSync:</strong> Tap on “iPhone OS 3 Party”, Tap on “All Packages”, Tap 
on “AppSync for OS 3.1”, tap “Modify”, then tap “Install”, lastly tap 
“Confirm”</li>
  <li><strong>Restart:</strong> After you see the button that says “Return to Cydia”, you can 
tap it and then restart the device</li>
</ol>

<h3 id="3-provision-install-the-provisioning-profile-on-device">3. Provision: Install the Provisioning Profile on Device</h3>

<table>
  <thead>
    <tr>
      <th>Add Profile</th>
      <th>Profile Installed</th>
      <th>Device Verify</th>
    </tr>
  </thead>
  <tbody>
    <tr>
      <td><a href="/assets/images/retro-tech/ppc-iphone-2/provision1.png"><img src="/assets/images/retro-tech/ppc-iphone-2/provision1-thumb.png" alt="Add Profile" /></a></td>
      <td><a href="/assets/images/retro-tech/ppc-iphone-2/provision2.png"><img src="/assets/images/retro-tech/ppc-iphone-2/provision2-thumb.png" alt="Profile Installed" /></a></td>
      <td><a href="/assets/images/retro-tech/ppc-iphone-2/provision3.png"><img src="/assets/images/retro-tech/ppc-iphone-2/provision3-thumb.png" alt="Device Verification" /></a></td>
    </tr>
  </tbody>
</table>

<p>The last step before running an app is to connect it to your Vintage Mac and
ask the Mac to use it for development.</p>

<ol>
  <li><strong>Organizer:</strong> In Xcode, choose Window→Organizer and then plug in your device</li>
  <li><strong>Use for Development:</strong> Select your device in the sidebar and then click 
“Use for Development”(sorry, no screenshot because this is a 1-time action)</li>
  <li><strong>Add Profile:</strong> Under the Provisioning section, click the + button to add 
your provisioning profile</li>
  <li><strong>Device Verify:</strong> On your device, open Settings, then tap General, then tap 
Profiles to verify your provisioning profile was installed</li>
</ol>

<h3 id="4-run-run-app-on-device">4. Run: Run App on Device</h3>

<table>
  <thead>
    <tr>
      <th>Xcode Breakpoint</th>
      <th>iPhone Paused</th>
      <th>Xcode Paused</th>
      <th>iPhone Running</th>
      <th>Xcode Error</th>
    </tr>
  </thead>
  <tbody>
    <tr>
      <td><a href="/assets/images/retro-tech/ppc-iphone-2/run1.png"><img src="/assets/images/retro-tech/ppc-iphone-2/run1-thumb.png" alt="Xcode Set Breakpoint" /></a></td>
      <td><a href="/assets/images/retro-tech/ppc-iphone-2/run2.png"><img src="/assets/images/retro-tech/ppc-iphone-2/run2-thumb.png" alt="iPhone Paused" /></a></td>
      <td><a href="/assets/images/retro-tech/ppc-iphone-2/run3.png"><img src="/assets/images/retro-tech/ppc-iphone-2/run3-thumb.png" alt="Xcode Pause Breakpoint" /></a></td>
      <td><a href="/assets/images/retro-tech/ppc-iphone-2/run4.png"><img src="/assets/images/retro-tech/ppc-iphone-2/run4-thumb.png" alt="iPhone Running" /></a></td>
      <td><a href="/assets/images/retro-tech/ppc-iphone-2/run5.png"><img src="/assets/images/retro-tech/ppc-iphone-2/run5-thumb.png" alt="Xcode Error" /></a></td>
    </tr>
  </tbody>
</table>

<p>You’re probably pretty tired by now, but hang in there, we are about to finally 
achieve our goal! Running your custom app on your vintage iPhone with full
debugger and all the goodies.</p>

<ol>
  <li>Open your app project in Xcode, then follow numbers 1 through 5 in the Xcode 
Breakpoint screenshot above:
    <ol>
      <li>① Open <code class="language-plaintext highlighter-rouge">main.m</code></li>
      <li>② Set a breakpoint on or before UIApplicationMain (click in that little 
gutter area)</li>
      <li>③ Make sure the Overview menu is set to run on Device</li>
      <li>④ Click to change to the debugging view</li>
      <li>⑤ Click Build and Go</li>
    </ol>
  </li>
  <li>Wait 30-60 seconds and you should see your app launch on your phone and it 
will pause at the launch image</li>
  <li>In Xcode you will see the breakpoint was hit, click the Continue button</li>
  <li>On your phone, your app will now be running</li>
  <li>If you see the error in the screenshot above with the selected console output
that means that AppSync from the previous step is not installed or not 
working properly and the iPhone is still checking signatures</li>
</ol>

<h2 id="congratulations">Congratulations!</h2>

<p><i class="apl-computer-imac-g4-17-256 reflect below-sm round-none"></i>
<i class="apl-device-iphone-128 reflect below-lg round-none"></i>
<i class="apl-computer-imac-aluminum-20-256 reflect below-sm round-none"></i></p>

<p>You now have a setup that can build and deploy apps to your vintage iPhone!
Please enjoy the process of making vintage apps and working with old school 
Objective-C. It’s kind of a pain in the butt, but I think you will enjoy its
simplicity and flexibility.</p>

<p>If you want to run MameDaifuku, my sample app that lists out some build and
runtime information, you can clone or download it from GitHub.
<a href="https://github.com/jeffreybergier/MameDaifuku">https://github.com/jeffreybergier/MameDaifuku</a></p>]]></content><author><name></name></author><category term="Retro-Tech" /><category term="Apps" /><category term="PowerPC" /><category term="iOS" /><category term="Hobby" /><summary type="html"><![CDATA[iOS Developers out there, have you ever been interested in stepping back from the new hotness for a moment to revisit your roots and try developing apps for the original iPhone? This article will walk you through the whole process. A lot of things have changed since 2008, but it's still possible in 2025.]]></summary></entry><entry><title type="html">Enabling iPhone Development for PowerPC Macs</title><link href="https://jeffburg.com/retro-tech/2025/12/04/PPC-iPhone-1.html" rel="alternate" type="text/html" title="Enabling iPhone Development for PowerPC Macs" /><published>2025-12-04T00:00:00+00:00</published><updated>2025-12-04T00:00:00+00:00</updated><id>https://jeffburg.com/retro-tech/2025/12/04/PPC-iPhone-1</id><content type="html" xml:base="https://jeffburg.com/retro-tech/2025/12/04/PPC-iPhone-1.html"><![CDATA[<table>
  <thead>
    <tr>
      <th style="width: 50%;">PowerPC Setup</th>
      <th>Xcode Screenshots</th>
    </tr>
  </thead>
  <tbody>
    <tr>
      <td style="vertical-align: top;">
        <a href="/assets/images/retro-tech/ppc-iphone-1/run3.jpeg">
          <img src="/assets/images/retro-tech/ppc-iphone-1/run3-thumb.jpeg" alt="iMac G4 Beauty Shot" style="width: 100%; height: auto;" />
        </a>
      </td>
      <td style="vertical-align: top;">
        <a href="/assets/images/retro-tech/ppc-iphone-1/run2.png">
          <img src="/assets/images/retro-tech/ppc-iphone-1/run2-thumb.png" alt="Xcode Screenshot" />
        </a>
        <a href="/assets/images/retro-tech/ppc-iphone-1/run1.png">
          <img src="/assets/images/retro-tech/ppc-iphone-1/run1-thumb.png" alt="Xcode Screenshot" />
        </a>
      </td>
    </tr>
  </tbody>
</table>

<h2 id="table-of-contents">Table of Contents</h2>

<ul id="markdown-toc">
  <li><a href="#table-of-contents" id="markdown-toc-table-of-contents">Table of Contents</a></li>
  <li><a href="#overview" id="markdown-toc-overview">Overview</a>    <ul>
      <li><a href="#caveats" id="markdown-toc-caveats">Caveats</a></li>
      <li><a href="#approach" id="markdown-toc-approach">Approach</a></li>
      <li><a href="#system-requirements" id="markdown-toc-system-requirements">System Requirements</a></li>
    </ul>
  </li>
  <li><a href="#tutorial" id="markdown-toc-tutorial">Tutorial</a>    <ul>
      <li><a href="#0-download-everything" id="markdown-toc-0-download-everything">0. Download Everything</a></li>
      <li><a href="#1-install-xcode-314" id="markdown-toc-1-install-xcode-314">1. Install Xcode 3.1.4</a></li>
      <li><a href="#2-force-install-the-iphone-os-313-sdk" id="markdown-toc-2-force-install-the-iphone-os-313-sdk">2. Force install the iPhone OS 3.1.3 SDK</a></li>
      <li><a href="#3-force-install-iphone-simulatorapp-from-the-iphone-os-221-sdk" id="markdown-toc-3-force-install-iphone-simulatorapp-from-the-iphone-os-221-sdk">3. Force install iPhone Simulator.app from the iPhone OS 2.2.1 SDK</a></li>
      <li><a href="#4-patch-ld" id="markdown-toc-4-patch-ld">4. Patch ld</a></li>
      <li><a href="#5-run-an-app-in-the-simulator" id="markdown-toc-5-run-an-app-in-the-simulator">5. Run an App in the Simulator</a></li>
      <li><a href="#6-coming-soon-run-an-app-on-device" id="markdown-toc-6-coming-soon-run-an-app-on-device">6. (Coming Soon) Run an App on Device</a></li>
    </ul>
  </li>
</ul>

<h2 id="overview">Overview</h2>

<p>Apple always officially required an Intel Mac to do iPhone app development, 
but I figured out how to get the iPhone OS 3.1.3 SDK installed for developing 
Original iPhone and iPhone 3G apps on your PowerPC Mac. This builds upon the
work of whoever in the community created the custom installers and scripts found
on <a href="https://www.macintoshrepository.org/1090-iphone-os-2-2-1-sdk-for-ppc">Macintosh Repository</a>.
This hack relied on the fact that even though Apple required Intel Macs for
iPhone development, they actually shipped universal binaries for the iPhone
SDK up until iPhone OS 2.2.1 SDK.</p>

<p>But the 2.2.1 SDK is quite limited and the iPhone really started to come into
its own with the 3.0 and higher SDKs. These included critical improvements
like Core Data, AVFoundation, MediaPlayer, and others. So I started to look
into if it was possible to get the new SDK on a PowerPC Mac as well. And to my
surprise, it is possible! And will even deploy to a real iPhone running 3.1.3.</p>

<p>In this document I will walk you through how I did it.</p>

<h3 id="caveats">Caveats</h3>

<p>While this does work, there are some fundamental limitations</p>

<ul>
  <li>iPhone Simulator only runs iPhone OS 2.2.1
    <ul>
      <li>This cannot be overcome because Apple only shipped universal PowerPC and Intel binaries for iPhone OS 2.2.1 and lower</li>
    </ul>
  </li>
  <li>You must have a developer account if you want to deploy to device
    <ul>
      <li>There are probably workarounds, but I just did everything the official way</li>
    </ul>
  </li>
  <li>Your iPhone must be Jailbroken if you want to deploy to device
    <ul>
      <li>I think this is due to expired certificate authorities on the iPhone OS 3.1.3 but I am not 100% sure</li>
    </ul>
  </li>
  <li>This Xcode 3 is very old and is not much different than the original Project Builder
    <ul>
      <li>Xcode would not get its new UI style that is still used today until Xcode 4 which only runs on Mac OS X 10.6 Snow Leopard which is Intel only</li>
      <li>The SDK does not support many basic features such as Automatic Reference Counting</li>
    </ul>
  </li>
</ul>

<h3 id="approach">Approach</h3>

<ol>
  <li>Install Xcode 3.1.4</li>
  <li>Force install the iPhone OS 3.1.3 SDK</li>
  <li>Force install iPhone Simulator.app from the iPhone OS 2.2.1 SDK</li>
  <li>Patch some installed files so everything runs on PowerPC</li>
</ol>

<h3 id="system-requirements">System Requirements</h3>

<ul>
  <li>PowerPC Mac</li>
  <li>Mac OS X Leopard 10.5.8 with all updates installed</li>
  <li>To run on real device
    <ul>
      <li>USB 2.0 (it might work with USB 1.1 but no promises)</li>
      <li>Original iPhone, iPhone 3G, iPod Touch (1st generation), iPod Touch (2nd generation)</li>
      <li>Device running OS software 3.1.3 or lower
        <ul>
          <li>These devices can easily be downgraded using <a href="https://github.com/LukeZGD/Legacy-iOS-Kit">Legacy iOS Kit</a></li>
        </ul>
      </li>
    </ul>
  </li>
</ul>

<h2 id="tutorial">Tutorial</h2>

<h3 id="0-download-everything">0. Download Everything</h3>

<p><img src="/assets/images/retro-tech/ppc-iphone-1/download1.png" alt="AquaFox About Window" /></p>

<table>
  <thead>
    <tr>
      <th>Internet Archive</th>
      <th>Macintosh Repository</th>
      <th>All Downloaded</th>
    </tr>
  </thead>
  <tbody>
    <tr>
      <td><a href="/assets/images/retro-tech/ppc-iphone-1/download2.png"><img src="/assets/images/retro-tech/ppc-iphone-1/download2-thumb.png" alt="Internet Archive" /></a></td>
      <td><a href="/assets/images/retro-tech/ppc-iphone-1/download3.png"><img src="/assets/images/retro-tech/ppc-iphone-1/download3-thumb.png" alt="Internet Archive" /></a></td>
      <td><a href="/assets/images/retro-tech/ppc-iphone-1/download4.png"><img src="/assets/images/retro-tech/ppc-iphone-1/download4-thumb.png" alt="Internet Archive" /></a></td>
    </tr>
  </tbody>
</table>

<p>If you use <a href="https://blackbirdlc.github.io/aquafox/Homepage.html">AquaFox</a>, 
you can actually do the downloads directly on your PowerPC Mac. But of course, 
you can also download everything on a modern computer and transfer it over to 
the Mac via AFP or SCP.</p>

<ol>
  <li><a href="https://archive.org/download/iOS_Firmware_Exhibit_Collection"><code class="language-plaintext highlighter-rouge">iphone_sdk_3.1.3_with_xcode_3.1.4__leopard__9m2809a.dmg</code></a> (Internet Archive)
    <ol>
      <li><a href="https://archive.org/download/iOS_Firmware_Exhibit_Collection/iphone_sdk_3.1.3_with_xcode_3.1.4__leopard__9m2809a.dmg">Direct Link</a> in case you can’t find the exact right build <code class="language-plaintext highlighter-rouge">9m2809a</code></li>
    </ol>
  </li>
  <li><a href="https://www.macintoshrepository.org/1090-iphone-os-2-2-1-sdk-for-ppc"><code class="language-plaintext highlighter-rouge">iPhone_SDK_for_iPhone_OS_2.2.1_PPC.iso</code></a> (Macintosh Repository)
    <ol>
      <li>Also available on <a href="https://macintoshgarden.org/apps/iphone-os-221-sdk-ppc">Macintosh Garden</a></li>
    </ol>
  </li>
  <li><a href="/assets/downloads/retro-tech/ppc-iphone-1/iPhone313PPCInstaller.zip"><code class="language-plaintext highlighter-rouge">iPhone313PPCInstaller.zip</code></a> (This website)
    <ol>
      <li>Do not download <code class="language-plaintext highlighter-rouge">iPhoneSDK.dist_.zip</code> or <code class="language-plaintext highlighter-rouge">iPhonePPCEnabler.dmg</code> on Macintosh Repository as these are for the 2.2.1 SDK only</li>
    </ol>
  </li>
  <li>Unzip <code class="language-plaintext highlighter-rouge">iPhone313PPCInstaller.zip</code></li>
</ol>

<h3 id="1-install-xcode-314">1. Install Xcode 3.1.4</h3>

<p><a href="/assets/images/retro-tech/ppc-iphone-1/install1.png"><img src="/assets/images/retro-tech/ppc-iphone-1/install1-thumb.png" alt="Install Xcode 3.1.4" /></a></p>

<p>Mount the <code class="language-plaintext highlighter-rouge">iphone_sdk_3.1.3_with_xcode_3.1.4__leopard__9m2809a.dmg</code> and open
the installer file to do a normal install of Xcode. I selected all possible 
options, but you should only need the basic developer tools package. The 
installer WILL NOT let you select the iPhone SDK packages. That’s OK, we will
do that in the next step. This took about 30 minutes on my 1.25GHz iMac G4 
with 1TB SSD, so please be patient if your system is slower and/or does not 
have an SSD.</p>

<p>Note that you must install in the default location <code class="language-plaintext highlighter-rouge">/Developer</code></p>

<h3 id="2-force-install-the-iphone-os-313-sdk">2. Force install the iPhone OS 3.1.3 SDK</h3>

<p><a href="/assets/images/retro-tech/ppc-iphone-1/install2.png"><img src="/assets/images/retro-tech/ppc-iphone-1/install2-thumb.png" alt="Force Install iPhone OS 3.1.3 SDK" /></a></p>

<ol>
  <li>Verify that the iPhone SDK disk image is mounted with the correct name
    <ol>
      <li>Open terminal and type <code class="language-plaintext highlighter-rouge">ls -al /Volumes</code></li>
      <li>You should see <code class="language-plaintext highlighter-rouge">iPhone SDK</code>, not <code class="language-plaintext highlighter-rouge">iPhone SDK 2</code> or some other name. If
it’s not called exactly <code class="language-plaintext highlighter-rouge">iPhone SDK</code> then the installer will fail.</li>
    </ol>
  </li>
  <li>Open <code class="language-plaintext highlighter-rouge">iPhone313PPCInstaller.mpkg</code> and run the installer
    <ol>
      <li>This installs the entire iPhone OS 3.1.3 SDK except for simulators higher
than 2.2.1. Those simulators are Intel only and therefore will never work
on a PowerPC Mac.</li>
    </ol>
  </li>
  <li>Unmount the iPhone SDK disk image</li>
</ol>

<p>At this point you will have a fully working Xcode install and you will even
be able to create new iPhone projects. However, there are 3 problems that need 
to be fixed:</p>

<ol>
  <li>iPhone Simulator.app will not open because it is Intel only</li>
  <li>The copy of <code class="language-plaintext highlighter-rouge">ld</code> for the iPhone SDK is Intel only</li>
  <li>Interface Builder cannot open XIBs for the iPhone because its plugin is Intel only</li>
</ol>

<p>If you want to confirm that iPhone Simulator is Intel only you can use the 
following terminal command:</p>

<div class="language-bash highlighter-rouge"><div class="highlight"><pre class="highlight"><code>ichigodaifuku:~ me<span class="nv">$ </span>lipo <span class="nt">-archs</span> /Developer/Platforms/iPhoneSimulator.platform/Developer/Applications/iPhone<span class="se">\ </span>Simulator.app/Contents/MacOS/iPhone<span class="se">\ </span>Simulator 
i386
</code></pre></div></div>

<p>You can use <code class="language-plaintext highlighter-rouge">lipo -archs</code> to check any binary on your system to see if it is
universal.</p>

<h3 id="3-force-install-iphone-simulatorapp-from-the-iphone-os-221-sdk">3. Force install iPhone Simulator.app from the iPhone OS 2.2.1 SDK</h3>

<p><a href="/assets/images/retro-tech/ppc-iphone-1/install3.png"><img src="/assets/images/retro-tech/ppc-iphone-1/install3-thumb.png" alt="Force Install iPhone OS 2.2.1 Simulator" /></a></p>

<p>One of the included files is <code class="language-plaintext highlighter-rouge">iPhone221PPCInstaller.mpkg</code>. This file was 
originally provided on Macintosh Repository but I customized it to only install
one small part of the iPhone OS 2.2.1 SDK instead of the whole thing. It only
installs the <code class="language-plaintext highlighter-rouge">iPhoneSimulatorPlatform.pkg</code> which installs the Universal binary
version of the iPhone Simulator as well as the Interface Builder plugin for
iPhone XIBs.</p>

<ol>
  <li>Unmount the iPhone SDK disk image (if you didn’t do it already as instructed in the previous step)</li>
  <li>Mount <code class="language-plaintext highlighter-rouge">iPhone_SDK_for_iPhone_OS_2.2.1_PPC.iso</code></li>
  <li>Verify that the iPhone SDK disk image is mounted with the correct name
    <ol>
      <li>Open terminal and type <code class="language-plaintext highlighter-rouge">ls -al /Volumes</code></li>
      <li>You should see <code class="language-plaintext highlighter-rouge">iPhone SDK</code>, not <code class="language-plaintext highlighter-rouge">iPhone SDK 2</code> or some other name. If
it’s not called exactly <code class="language-plaintext highlighter-rouge">iPhone SDK</code> then the installer will fail.</li>
    </ol>
  </li>
  <li>Open <code class="language-plaintext highlighter-rouge">iPhone221PPCInstaller.mpkg</code> and run the installer. This installs:
    <ol>
      <li>iPhone Simulator app that is a Universal Binary</li>
      <li>Interface Builder plugin for reading iPhone XIBs that is a Universal Binary</li>
      <li>Runs a script that patches the xcspec files
        <ol>
          <li>There is no credit for this script on Macintosh Repository</li>
          <li>If you want to know more about what it patches, see this <a href="https://chrishardie.com/2009/01/using-the-iphoneos-sdk-on-older-ppc-macs/">blog post by Chris Hardie</a></li>
        </ol>
      </li>
    </ol>
  </li>
</ol>

<h3 id="4-patch-ld">4. Patch ld</h3>

<div class="language-bash highlighter-rouge"><div class="highlight"><pre class="highlight"><code>ichigodaifuku:~ me<span class="nv">$ </span><span class="nb">chmod</span> +x /Users/me/Desktop/iPhoneSDKInstall/iPhone313PPCldPatch.sh 
ichigodaifuku:~ me<span class="nv">$ </span><span class="nb">sudo</span> /Users/me/Desktop/iPhoneSDKInstall/iPhone313PPCldPatch.sh 
<span class="nt">---</span> iPhone OS 3.1.3 PPC Enabler LD Patch Post-Install Script Started <span class="nt">---</span>
Verifying files: SUCCESS.
Target linker <span class="o">(</span>/Developer/Platforms/iPhoneOS.platform/Developer/usr/bin/ld<span class="o">)</span> and <span class="nb">source </span>linker <span class="o">(</span>/Developer/usr/bin/ld<span class="o">)</span> found.
COMMAND: Backing up Intel <span class="s1">'ld'</span> binary to /Developer/Platforms/iPhoneOS.platform/Developer/usr/bin/ld.backup.intel
COMMAND: Copying functional PPC <span class="s1">'ld'</span> over the Intel one...
COMMAND: Setting executable permissions <span class="k">for</span> /Developer/Platforms/iPhoneOS.platform/Developer/usr/bin/ld
SUCCESS: PPC <span class="s1">'ld'</span> copied and permissions set.
<span class="nt">---</span> iPhone OS 3.1.3 PPC Enabler LD Patch Post-Install Script Completed Successfully <span class="nt">---</span>
ichigodaifuku:~ me<span class="nv">$ </span>
</code></pre></div></div>

<p>The normal version of <code class="language-plaintext highlighter-rouge">ld</code> that comes with Xcode is a universal binary but the
version that comes with the iPhone SDK is Intel only (for some reason).
It’s the only Intel-only part of the SDK, as far as I can tell. I provided a
script to patch <code class="language-plaintext highlighter-rouge">ld</code> to make it easy, but all it does is backup the original 
and then copy the version from Xcode into the place the iPhone SDK is.</p>

<p>I wanted to make the script run automatically at the end of Step 2 but I could 
not figure out how to insert the script into the installer. If you know how,
please let me know and I will improve <code class="language-plaintext highlighter-rouge">iPhone313PPCInstaller.mpkg</code></p>

<ol>
  <li>Open Terminal</li>
  <li>Change the permissions to make the script executable (this is not preserved by the zip file)
    <ol>
      <li>Type <code class="language-plaintext highlighter-rouge">chmod +x </code> note the space at the end</li>
      <li>Drag <code class="language-plaintext highlighter-rouge">iPhone313PPCldPatch.sh</code> into the terminal window</li>
      <li>Press the return key to set the permissions</li>
    </ol>
  </li>
  <li>Execute the script with admin privileges
    <ol>
      <li>Type <code class="language-plaintext highlighter-rouge">sudo </code> note the space at the end</li>
      <li>Drag <code class="language-plaintext highlighter-rouge">iPhone313PPCldPatch.sh</code> into the terminal window</li>
      <li>Press the return key to run the script</li>
    </ol>
  </li>
  <li>The terminal output should look like the code snippet above</li>
  <li>Restart your computer</li>
</ol>

<p>If you want to manually verify it worked, you can use the <code class="language-plaintext highlighter-rouge">lipo</code> command again:</p>

<div class="language-bash highlighter-rouge"><div class="highlight"><pre class="highlight"><code>ichigodaifuku:~ me<span class="nv">$ </span>lipo <span class="nt">-archs</span> /Developer/Platforms/iPhoneOS.platform/Developer/usr/bin/ld.backup.intel
i386
ichigodaifuku:~ me<span class="nv">$ </span>lipo <span class="nt">-archs</span> /Developer/Platforms/iPhoneOS.platform/Developer/usr/bin/ld
i386 ppc7400
ichigodaifuku:~ me<span class="nv">$ </span>
</code></pre></div></div>

<h3 id="5-run-an-app-in-the-simulator">5. Run an App in the Simulator</h3>

<table>
  <thead>
    <tr>
      <th>Step 2</th>
      <th>Step 3</th>
      <th>Step 4</th>
      <th>Step 5</th>
    </tr>
  </thead>
  <tbody>
    <tr>
      <td><a href="/assets/images/retro-tech/ppc-iphone-1/test1.png"><img src="/assets/images/retro-tech/ppc-iphone-1/test1-thumb.png" alt="Test Simulator 1" /></a></td>
      <td><a href="/assets/images/retro-tech/ppc-iphone-1/test2.png"><img src="/assets/images/retro-tech/ppc-iphone-1/test2-thumb.png" alt="Test Simulator 2" /></a></td>
      <td><a href="/assets/images/retro-tech/ppc-iphone-1/test3.png"><img src="/assets/images/retro-tech/ppc-iphone-1/test3-thumb.png" alt="Test Simulator 3" /></a></td>
      <td><a href="/assets/images/retro-tech/ppc-iphone-1/test4.png"><img src="/assets/images/retro-tech/ppc-iphone-1/test4-thumb.png" alt="Test Simulator 4" /></a></td>
    </tr>
  </tbody>
</table>

<p>We can’t deploy to device yet as there is more work to do, but you should make 
a sample app and make sure it launches in the simulator.</p>

<ol>
  <li>Open Xcode and select File→New Project</li>
  <li>Choose any iPhone project you like but I chose “Tab Bar Application”</li>
  <li>There is a toolbar item labeled “Overview” where you can change the deployment target from Device to Simulator</li>
  <li>Now open one of the XIBs in Interface Builder to make sure that is working. Change some text so you know that the app runs properly when changed</li>
  <li>Click Build and Run to compile the app, launch the Simulator app, and launch your new app</li>
</ol>

<h3 id="6-coming-soon-run-an-app-on-device">6. (Coming Soon) Run an App on Device</h3>

<p>In the next episode, we will go through the steps needed to get an app running
on the device. Remember, this is before Xcode could manage signing for you, so
you will need to do it the old fashioned way <i class="fa-solid fa-hand-peace"></i></p>]]></content><author><name></name></author><category term="Retro-Tech" /><category term="Apps" /><category term="PowerPC" /><category term="iOS" /><category term="Hobby" /><summary type="html"><![CDATA[Apple always officially required an Intel Mac to do iPhone app development, but I figured out how to get the iPhone OS 3.1.3 SDK installed for developing Original iPhone and iPhone 3G apps on your PowerPC Mac.]]></summary></entry><entry><title type="html">Retro Software Update Server</title><link href="https://jeffburg.com/retro-tech/2025/09/09/Retro-Software-Update-Server.html" rel="alternate" type="text/html" title="Retro Software Update Server" /><published>2025-09-09T00:00:00+00:00</published><updated>2025-09-09T00:00:00+00:00</updated><id>https://jeffburg.com/retro-tech/2025/09/09/Retro-Software-Update-Server</id><content type="html" xml:base="https://jeffburg.com/retro-tech/2025/09/09/Retro-Software-Update-Server.html"><![CDATA[<p>A guide on setting up an Apple Software Update Server Mirror in case Apple ever
decides to shut down these old update servers. So far software update still
works on Mac OS X 10.4 and above, but Apple already shut down servers for 10.3,
10.2, 10.1, and 10.0 and those can’t be recovered.</p>

<p>If you have an interest in retro Macs, this may be something you would like to
set up in case something bad were to happen. This approach works because these
servers are still online and still work. If you happen to be reading this 10
years in the future (2035) because Apple shut down the software update servers
for PowerPC Macs, then it’s too late. Sorry.</p>

<h2 id="table-of-contents">Table of Contents</h2>

<ul id="markdown-toc">
  <li><a href="#table-of-contents" id="markdown-toc-table-of-contents">Table of Contents</a></li>
  <li><a href="#who-am-i" id="markdown-toc-who-am-i">Who Am I</a></li>
  <li><a href="#how-do-software-updates-work-on-the-mac" id="markdown-toc-how-do-software-updates-work-on-the-mac">How do Software Updates Work on the Mac</a></li>
  <li><a href="#approach--guide--table-of-contents" id="markdown-toc-approach--guide--table-of-contents">Approach / Guide / Table of Contents</a></li>
  <li><a href="#system-requirements" id="markdown-toc-system-requirements">System Requirements</a></li>
  <li><a href="#guide" id="markdown-toc-guide">Guide</a>    <ul>
      <li><a href="#1-install-git-homebrew-python2" id="markdown-toc-1-install-git-homebrew-python2">1. Install Git, Homebrew, Python2</a>        <ul>
          <li><a href="#python2" id="markdown-toc-python2">Python2</a></li>
        </ul>
      </li>
      <li><a href="#2-choose-where-software-updates-will-be-mirrored-on-your-server-mac" id="markdown-toc-2-choose-where-software-updates-will-be-mirrored-on-your-server-mac">2. Choose where Software Updates will be mirrored on your server Mac</a></li>
      <li><a href="#3-configure-the-web-server-on-your-server-mac" id="markdown-toc-3-configure-the-web-server-on-your-server-mac">3. Configure the Web Server on your server Mac</a></li>
      <li><a href="#4-configure-reposado-on-your-server-mac" id="markdown-toc-4-configure-reposado-on-your-server-mac">4. Configure Reposado on your server Mac</a></li>
      <li><a href="#5-use-reposado-to-mirror-apples-existing-software-updates-to-your-server-mac" id="markdown-toc-5-use-reposado-to-mirror-apples-existing-software-updates-to-your-server-mac">5. Use Reposado to mirror Apple’s existing software updates to your server Mac</a></li>
      <li><a href="#6-configure-the-retro-mac-to-fetch-updates-from-your-server-mac" id="markdown-toc-6-configure-the-retro-mac-to-fetch-updates-from-your-server-mac">6. Configure the retro Mac to fetch updates from your server Mac</a></li>
    </ul>
  </li>
</ul>

<h2 id="who-am-i">Who Am I</h2>

<p>I’m Jeff, a fan of Mac OS X, NeXT, a software developer, and general retro tech
enthusiast. I have other retro tech guides as well as software I have developed
for retro Macs, so please check it out.</p>

<ul>
  <li><a href="https://github.com/jeffreybergier/MathEdit">MathEdit for OpenStep</a>
    <ul>
      <li><a href="https://jeffburg.social/tags/OpenStep">MathEdit Development Posts on my Mastodon</a></li>
    </ul>
  </li>
  <li><a href="/retro-tech/2025/08/17/Retro-Stream-Tutorial.html">Retro Stream Tutorial</a></li>
  <li><a href="https://jeffburg.social/tags/iMacG4">iMac G4 Posts on my Mastodon</a></li>
  <li><a href="https://jeffburg.social/tags/iMac5K">Homemade iMac 5K Monitor posts on my Mastodon</a></li>
</ul>

<h2 id="how-do-software-updates-work-on-the-mac">How do Software Updates Work on the Mac</h2>

<p><img src="/assets/images/retro-tech/software-update-server/002-SUS.png" alt="Retro Software Update Server" /></p>

<p>The software update system for Mac OS X 10.4 and higher is actually amazingly
simple and flexible. For 10.3 and lower, it was a traditional client/server
application. The client would send some information about itself to the server
and the server would process this and tell the client what updates it needed.
While this seems logical, it also means your servers will be busy processing
requests from clients. And as Apple started to become really successful at
selling Macs in the early 2000s the OS X team probably realized that this would
fail to scale.</p>

<p>So what did they change? Well, in 10.4 and later, the Software Update Server is
nothing more than a huge set of files and a few Update catalogs… one for each
version of the OS. These sucatalog files list every update available as well
as “distribution” files. These distributions are available for every supported
language. They contain the localized description, but they also contain inline
JavaScript that will be executed by the client to determine if the update is
needed.</p>

<p>What this means is Apple offloaded all of the work of determining which updates
it needs from the server to the client. This is great for Apple’s server load,
but it also explains why checking for updates can take so long the first time.
The client literally needs to download hundreds of distribution files. Yes, they
are only a few K each, but then the client also needs to execute the JavaScript
for each one.</p>

<p>The other side-effect of this system is that now it is easy to mirror the
software update server as there is no server-side logic.</p>

<p><strong>Enter Mac OS X Server Software Update Server</strong></p>

<p>Back in the day, Apple included a Software Update Server as part of Mac OS X
Server. Apple intended companies to use this to mirror the software updates
internally in a company to do 2 things:</p>

<ol>
  <li>Save bandwidth when updating a fleet of Macs</li>
  <li>Control which updates were
available to the Macs in your company to ensure that you could test
compatibility first</li>
</ol>

<p>This feature is long dead and now Apple facilitates the same control by allowing
companies to white list or blacklist updates via MDM (Mobile Device Management).
This does not create a mirror, but simply tells client Macs to ignore updates.
This method does not save bandwidth in your company. But in the modern day,
bandwidth is a lot less expensive than it used to be.</p>

<p>When I first started this project, I actually tried to use 10.6 Snow Leopard
Server to host the software update server. However, after much troubleshooting,
I could not get it to download the updates reliably. It would only download
about 1/3 of the updates which is not enough for success. I don’t know why it
refused to download them. All it said was there was a suspected security problem
and so it refused. ChatGPT suggested that the Apple Software Update Server
distributed with their OS had very picky client-side URL validation and if the
URLs failed these basic checks, it would not even start the download.</p>

<p><strong>Enter <a href="https://github.com/wdas/reposado/blob/main/docs/getting_started.md">Reposado</a></strong></p>

<p>Reposado is an open source project written in Python 2 that replicates the
functionality of the software update server. It checks the Apple catalogs,
downloads the updates, and then generates new catalogs specific to your mirror.
In my experience doing this, it seems to work super well. So this guide will
explain how to set this up for you so you can prepare for the very dark day when
Apple shuts down these old software updates (which may never come).</p>

<h2 id="approach--guide--table-of-contents">Approach / Guide / Table of Contents</h2>

<ol>
  <li>Install Git, Homebrew, Python2</li>
  <li>Choose where Software Updates will be mirrored on your server Mac</li>
  <li>Configure the Web Server on your server Mac</li>
  <li>Configure Reposado on your server Mac</li>
  <li>Use Reposado to mirror Apple’s existing software updates to your server Mac</li>
  <li>Configure the retro Mac to fetch updates from your server Mac</li>
</ol>

<h2 id="system-requirements">System Requirements</h2>

<p><strong>Server Mac</strong></p>

<ol>
  <li>50GB+ to dedicate to storing updates
    <ul>
      <li>Even the minimal set for 10.4 Tiger is 20GB</li>
      <li>Supporting all the way to 10.9 Mavericks takes 200GB</li>
      <li>ChatGPT says that around 10.11/10.12 Apple started locking down the 
software update server and it can’t be changed</li>
    </ul>
  </li>
  <li>A normal home network
    <ul>
      <li>This guide assumes you connect all your Macs to the internet with ethernet 
or WiFi and they can find each other and connect to each other using Bonjour
names.</li>
    </ul>
  </li>
</ol>

<p><strong>Retro Mac</strong></p>

<ol>
  <li>Connected to Ethernet or WiFi on the same network as your server Mac</li>
  <li>Mac OS X 10.4 or higher</li>
</ol>

<p>Note that the server Mac can really be any system. Even modern Linux (such as 
Debian and Ubuntu) automatically identify themselves via Bonjour names. But
this guide gives instructions when using a Mac as the server.</p>

<h2 id="guide">Guide</h2>

<p>This guide pretty much runs 100% from Terminal. 
Any text <code class="language-plaintext highlighter-rouge">in this special format</code> is a terminal command you can copy and paste.</p>

<h3 id="1-install-git-homebrew-python2">1. Install Git, Homebrew, Python2</h3>

<ul>
  <li>Git is included as part of the Xcode command line utilities AND these utilities
are required for Homebrew anyway.</li>
</ul>

<p><code class="language-plaintext highlighter-rouge">xcodeselect --install</code></p>

<ul>
  <li>Homebrew is a simple package manager for macOS. It’s easy to install.
Just follow the guide on <a href="https://brew.sh">https://brew.sh</a>. Make sure to 
follow the instructions in the Terminal after installing Homebrew.
They are required to make sure that commands you install via Homebrew are
easily launchable from the Terminal.</li>
</ul>

<p><code class="language-plaintext highlighter-rouge">/bin/bash -c "$(curl -fsSL https://raw.githubusercontent.com/Homebrew/install/HEAD/install.sh)"</code></p>

<h4 id="python2">Python2</h4>

<p>This is the difficult one. Python2 is far out of date and Homebrew no longer
has an easy installer for it. We have to use PyEnv and this basically seemed
to build Python2 from source, which is never fun.</p>

<p><strong>Install PyEnv and other tools needed for compiling</strong></p>

<p><code class="language-plaintext highlighter-rouge">brew install pyenv zlib bzip2 readline openssl@1.1</code></p>

<p><strong>Configure the environment for python2 build</strong></p>

<div class="language-plaintext highlighter-rouge"><div class="highlight"><pre class="highlight"><code>export LDFLAGS="-L$(brew --prefix zlib)/lib -L$(brew --prefix bzip2)/lib -L$(brew --prefix readline)/lib -L$(brew --prefix openssl@1.1)/lib"
export CPPFLAGS="-I$(brew --prefix zlib)/include -I$(brew --prefix bzip2)/include -I$(brew --prefix readline)/include -I$(brew --prefix openssl@1.1)/include"
export PKG_CONFIG_PATH="$(brew --prefix zlib)/lib/pkgconfig:$(brew --prefix bzip2)/lib/pkgconfig:$(brew --prefix readline)/lib/pkgconfig:$(brew --prefix openssl@1.1)/lib/pkgconfig"
</code></pre></div></div>

<p><strong>Configure your shell to use PyEnv</strong></p>

<p>Sorry you may need to look up the commands
for how to use <code class="language-plaintext highlighter-rouge">vi</code> or use a text editor you know better like <code class="language-plaintext highlighter-rouge">nano</code></p>

<p><code class="language-plaintext highlighter-rouge">vi ~/.zshrc</code></p>

<p>Paste in the following text and then save and exit</p>

<div class="language-plaintext highlighter-rouge"><div class="highlight"><pre class="highlight"><code>export PATH="$HOME/.pyenv/bin:$PATH"
eval "$(pyenv init --path)"
eval "$(pyenv init -)"
</code></pre></div></div>

<p><strong>Compile Python2</strong></p>

<p><code class="language-plaintext highlighter-rouge">pyenv install 2.7.18</code></p>

<p><strong>Set Python2 as the default</strong></p>

<p><code class="language-plaintext highlighter-rouge">pyenv global 2.7.18</code></p>

<p><strong>Test Python</strong></p>

<p>You should not get an error when running this command</p>

<p><code class="language-plaintext highlighter-rouge">python -version</code></p>

<h3 id="2-choose-where-software-updates-will-be-mirrored-on-your-server-mac">2. Choose where Software Updates will be mirrored on your server Mac</h3>

<p>The Software Update application on your Mac expects a very specific directory
structure and catalog format. Reposado creates this for you. But you still
need to decide where on your system this will go and you will also need
to configure the web server to use this directory. It is OK to have this on
an external drive as the mirror takes a lot of space.</p>

<p>On my system I put everything in</p>

<p><code class="language-plaintext highlighter-rouge">/Volumes/Data/Virtualization/SUS</code></p>

<p>So the Web Server Document Root and Reposado Storage is</p>

<p><code class="language-plaintext highlighter-rouge">/Volumes/Data/Virtualization/SUS/www</code></p>

<p>Reposado git clone is</p>

<p><code class="language-plaintext highlighter-rouge">/Volumes/Data/Virtualization/SUS/reposado</code></p>

<p>Reposado Metadata storage is</p>

<p><code class="language-plaintext highlighter-rouge">/Volumes/Data/Virtualization/SUS/reposado/code/metadata</code></p>

<p>So you can put everything wherever you like, but this guide assumes this
structure</p>

<h3 id="3-configure-the-web-server-on-your-server-mac">3. Configure the Web Server on your server Mac</h3>

<p>Mac OS X has always included Apache as a web server; it’s just disabled by
default. It’s nothing fancy, but it will work for our retro Mac.</p>

<p><strong>Set DocumentRoot to the directory you selected above</strong></p>

<p><code class="language-plaintext highlighter-rouge">sudo vi /etc/apache2/httpd.conf</code></p>

<p>This file is pretty long so you have to scroll down to find the DocumentRoot
setting. I don’t think you need to change other options, but here are the key
ones.</p>

<div class="language-plaintext highlighter-rouge"><div class="highlight"><pre class="highlight"><code>DocumentRoot "/Volumes/Data/Virtualization/SUS/www"
&lt;Directory "/Volumes/Data/Virtualization/SUS/www"&gt;
    Options Indexes FollowSymLinks
    AllowOverride All
    Require all granted
&lt;/Directory&gt;
</code></pre></div></div>

<p><strong>Give the webserver full disk access</strong></p>

<p>This might not be needed if your directory root is on the boot drive
but I definitely needed it because mine is on an external drive.</p>

<ol>
  <li>Open System Settings→Privacy→Full Disk Access</li>
  <li>Click the plus button and enter your admin password</li>
  <li>Press ⌘+Shift+G in the file picker and type <code class="language-plaintext highlighter-rouge">/usr/sbin/httpd</code></li>
</ol>

<p><strong>Turn on the Web Server</strong></p>

<p><code class="language-plaintext highlighter-rouge">sudo launchctl load -w /System/Library/LaunchDaemons/org.apache.httpd.plist</code></p>

<p><strong>Test the Web Server</strong></p>

<p>Put a test file in the document root. It can be any file, but perhaps a small
<code class="language-plaintext highlighter-rouge">.txt</code> file is easiest.</p>

<ol>
  <li>Open Safari on your Server Mac and type <code class="language-plaintext highlighter-rouge">http://localhost/mytestfile.txt</code></li>
  <li>Open Safari on your Retro Mac and type <code class="language-plaintext highlighter-rouge">http://Server-Bonjour-Name.local/mytestfile.txt</code></li>
</ol>

<p>Note that step 2 is critical. If you can’t get the website to load on your
Retro Mac you won’t be able to update from it either.</p>

<h3 id="4-configure-reposado-on-your-server-mac">4. Configure Reposado on your server Mac</h3>

<p>Ok, Reposado is where all the magic happens, so let’s get started!</p>

<p><strong>Clone the <a href="https://github.com/wdas/reposado">Reposado</a> Repository</strong></p>

<div class="language-plaintext highlighter-rouge"><div class="highlight"><pre class="highlight"><code>cd /Volumes/Data/Virtualization/SUS
git clone https://github.com/wdas/reposado.git
</code></pre></div></div>

<p><strong>Configure Reposado</strong></p>

<p><code class="language-plaintext highlighter-rouge">/Volumes/Data/Virtualization/SUS/reposado/code/repoutil --configure</code></p>

<p>Reposado will ask you for the directories you chose earlier. Note if you drag in
the directories from the Finder, it appends a space after them and the developer
of Reposado says this will cause errors.</p>

<div class="language-plaintext highlighter-rouge"><div class="highlight"><pre class="highlight"><code>Filesystem path to store replicated catalogs and updates [None]: /Volumes/Data/Virtualization/SUS/www
Filesystem path to store Reposado metadata [None]: /Volumes/Data/Virtualization/SUS/reposado/code/metadata 
Base URL for your local Software Update Service
(Example: http://su.your.org -- leave empty if you are not replicating updates) [None]: Server-Bonjour-Name.local
</code></pre></div></div>

<p><strong>Configure Reposado (Continued)</strong></p>

<p>Reposado defaults to being a production software update server mirror, which is
not what you want because you are setting up a retro software update mirror in
case of catastrophe. And you probably don’t want to take 400+GB of updates for
all modern Macs when you could use less than 100GB to support updating 10.6,
10.5, and 10.4 only.</p>

<p><code class="language-plaintext highlighter-rouge">open /Volumes/Data/SUS/reposado/code/preferences.plist</code> (TextEdit should open)</p>

<p>Your configuration file will look something like this. Copy and paste the keys
listed below into your configuration and then customize them as you like:</p>

<ul>
  <li><strong>AppleCatalogURLs</strong> to the bare minimum for 10.4 Tiger only (we will expand later after we confirm it’s working)</li>
  <li><strong>PreferredLocalizations</strong> to include the languages you care about</li>
  <li><strong>RepoSyncLogFile</strong> so you can see sync progress and verify everything is working</li>
</ul>

<div class="language-xml highlighter-rouge"><div class="highlight"><pre class="highlight"><code><span class="cp">&lt;?xml version="1.0" encoding="UTF-8"?&gt;</span>
<span class="cp">&lt;!DOCTYPE plist PUBLIC "-//Apple//DTD PLIST 1.0//EN" "http://www.apple.com/DTDs/PropertyList-1.0.dtd"&gt;</span>
<span class="nt">&lt;plist</span> <span class="na">version=</span><span class="s">"1.0"</span><span class="nt">&gt;</span>
<span class="nt">&lt;dict&gt;</span>
	<span class="nt">&lt;key&gt;</span>LocalCatalogURLBase<span class="nt">&lt;/key&gt;</span>
	<span class="nt">&lt;string&gt;</span>http://Barely-Regal.local<span class="nt">&lt;/string&gt;</span>
	<span class="nt">&lt;key&gt;</span>UpdatesMetadataDir<span class="nt">&lt;/key&gt;</span>
	<span class="nt">&lt;string&gt;</span>/Volumes/Data/Virtualization/SUS/reposado/code/metadata<span class="nt">&lt;/string&gt;</span>
	<span class="nt">&lt;key&gt;</span>UpdatesRootDir<span class="nt">&lt;/key&gt;</span>
	<span class="nt">&lt;string&gt;</span>/Volumes/Data/Virtualization/SUS/www<span class="nt">&lt;/string&gt;</span>
	<span class="nt">&lt;key&gt;</span>AppleCatalogURLs<span class="nt">&lt;/key&gt;</span>
    <span class="nt">&lt;array&gt;</span>
    <span class="nt">&lt;string&gt;</span>http://swscan.apple.com/content/catalogs/index.sucatalog<span class="nt">&lt;/string&gt;</span>
    <span class="nt">&lt;string&gt;</span>http://swscan.apple.com/content/catalogs/index-1.sucatalog<span class="nt">&lt;/string&gt;</span>
    <span class="nt">&lt;/array&gt;</span>
    <span class="nt">&lt;key&gt;</span>PreferredLocalizations<span class="nt">&lt;/key&gt;</span>
    <span class="nt">&lt;array&gt;</span>
    <span class="nt">&lt;string&gt;</span>English<span class="nt">&lt;/string&gt;</span>
    <span class="nt">&lt;string&gt;</span>en<span class="nt">&lt;/string&gt;</span>
    <span class="nt">&lt;string&gt;</span>Japanese<span class="nt">&lt;/string&gt;</span>
    <span class="nt">&lt;string&gt;</span>ja<span class="nt">&lt;/string&gt;</span>
    <span class="nt">&lt;/array&gt;</span>
    <span class="nt">&lt;key&gt;</span>RepoSyncLogFile<span class="nt">&lt;/key&gt;</span>
    <span class="nt">&lt;string&gt;</span>/var/log/reposado_sync.log<span class="nt">&lt;/string&gt;</span>
    <span class="nt">&lt;key&gt;</span>HumanReadableSizes<span class="nt">&lt;/key&gt;</span>
    <span class="nt">&lt;true/&gt;</span>
<span class="nt">&lt;/dict&gt;</span>
<span class="nt">&lt;/plist&gt;</span>
</code></pre></div></div>

<p><strong>Create the Log File</strong></p>

<p>Create the log file and make it readable and writable by all users. Normally it
would be better to make it readable and writable by the right people, but it’s a
single log file. Not really security critical.</p>

<p><code class="language-plaintext highlighter-rouge">sudo touch /var/log/reposado_sync.log</code>
<code class="language-plaintext highlighter-rouge">sudo chmod 777 /var/log/reposado_sync.log</code></p>

<p><strong>You’re Ready to Roll!</strong></p>

<p>In the next section we will fire this thing up and updates will start to stream
in!</p>

<h3 id="5-use-reposado-to-mirror-apples-existing-software-updates-to-your-server-mac">5. Use Reposado to mirror Apple’s existing software updates to your server Mac</h3>

<p>First we will do a test run with the minimal set of Software Update Catalogs
that you configured in the previous section. This is about 20-25GB worth of
updates, so depending on how fast or slow your internet connection is, this
could take a while. Reposado does not generate the catalogs for your retro Mac
to use until it has finished downloading everything, so you need to wait until
it finishes. This is why we start with the minimal catalogs.</p>

<p><strong>Tail the log so you can see the progress</strong></p>

<p>Open a new terminal window or tab and run this command to view the log as it
gets updated.</p>

<p><code class="language-plaintext highlighter-rouge">tail -f /var/log/reposado_sync.log</code></p>

<p><strong>Start the Software Update Sync</strong></p>

<p><code class="language-plaintext highlighter-rouge">/Volumes/Data/Virtualization/SUS/reposado/code/repo_sync</code></p>

<p>That’s it. Now you have to wait for it to download 20GB or so. You should be able
to see progress in the other terminal window with the tailed log file.</p>

<p><strong>What Success Looks Like</strong></p>

<p>The log file will output hundreds of lines, so you may be wondering what success
looks like. After downloading all of the files, Reposado will build the catalog
files and then report <code class="language-plaintext highlighter-rouge">repo_sync run ended</code>. It will look something like this.</p>

<div class="language-plaintext highlighter-rouge"><div class="highlight"><pre class="highlight"><code>Sep 07 17:26:44 Could not get data from dist file: /Volumes/Data/Virtualization/SUS/content/downloads/03/09/061-5359/mxWDL8cXkFTv9pCp8GMFr2bJFXjtqyQbvx/022-4184.English.dist
Sep 07 17:26:46 Could not replicate http://swcdn.apple.com/content/downloads/49/33/061-6390/BYBbD3TFbdpntDts78ddSzDSRpXnGKnQsy/FinalCutPro6.0.6Update.smd: Error 22: The requested URL returned error: 403
Sep 07 17:26:51 Building index.sucatalog...
Sep 07 17:26:51 WARNING: did not add product 061-1688 to catalog index.sucatalog.apple because it has not been downloaded.
Sep 07 17:26:51 WARNING: did not add product 061-2736 to catalog index.sucatalog.apple because it has not been downloaded.
Sep 07 17:26:51 WARNING: did not add product 061-1720 to catalog index.sucatalog.apple because it has not been downloaded.
Sep 07 17:26:51 WARNING: did not add product 041-85067 to catalog index.sucatalog.apple because it has not been downloaded.
Sep 07 17:26:51 WARNING: did not add product 061-6390 to catalog index.sucatalog.apple because it has not been downloaded.
Sep 07 17:26:51 WARNING: did not add product 061-2006 to catalog index.sucatalog.apple because it has not been downloaded.
Sep 07 17:26:51 WARNING: did not add product 061-5359 to catalog index.sucatalog.apple because it has not been downloaded.
Sep 07 17:26:51 WARNING: did not add product 061-2193 to catalog index.sucatalog.apple because it has not been downloaded.
Sep 07 17:26:52 178 products found in http://swscan.apple.com/content/catalogs/index-1.sucatalog
Sep 07 17:26:53 Building index-1.sucatalog...
Sep 07 17:26:54 268 products found in http://swscan.apple.com/content/catalogs/others/index-leopard.merged-1.sucatalog
Sep 07 17:26:55 Building index-leopard.merged-1.sucatalog...
Sep 07 17:26:56 345 products found in http://swscan.apple.com/content/catalogs/others/index-leopard-snowleopard.merged-1.sucatalog
Sep 07 17:27:05 Building index-leopard-snowleopard.merged-1.sucatalog...
Sep 07 17:27:08 600 products found in http://swscan.apple.com/content/catalogs/others/index-lion-snowleopard-leopard.merged-1.sucatalog
Sep 07 17:27:37 Building index-lion-snowleopard-leopard.merged-1.sucatalog...
Sep 07 17:27:38 448 products found in http://swscan.apple.com/content/catalogs/others/index-mountainlion-lion-snowleopard-leopard.merged-1.sucatalog
Sep 07 17:27:42 Building index-mountainlion-lion-snowleopard-leopard.merged-1.sucatalog...
Sep 07 17:27:43 464 products found in https://swscan.apple.com/content/catalogs/others/index-10.9-mountainlion-lion-snowleopard-leopard.merged-1.sucatalog
Sep 07 17:27:57 Building index-10.9-mountainlion-lion-snowleopard-leopard.merged-1.sucatalog...
Sep 07 17:27:58 repo_sync run ended
</code></pre></div></div>

<p>Warnings will be normal as some updates will not be available any longer. If the
number of products not downloaded is HUGE like, hundreds of items, then you have
a problem. But I think 10 or 20 is normal?</p>

<p><strong>Choose Max Version of OS X You Want Updates For</strong></p>

<p>This is a personal choice based on what Macs you are interested in, how much
space you have to dedicate to this, and what Macs you think Apple will remove
from the update servers soonest.</p>

<p>You can see all the catalogs in this <a href="https://github.com/wdas/reposado/blob/main/docs/reposado_preferences.md">Reposado file</a>.
They are named in a pretty orderly way, so select which OS you want to support
and then put in the catalog file for that one and all the versions lower. So if
you want to support 10.10 Yosemite and lower, your Preferences.plist would look
like this:</p>

<div class="language-plaintext highlighter-rouge"><div class="highlight"><pre class="highlight"><code>&lt;key&gt;AppleCatalogURLs&lt;/key&gt;
&lt;array&gt;
    &lt;string&gt;http://swscan.apple.com/content/catalogs/index.sucatalog&lt;/string&gt;
    &lt;string&gt;http://swscan.apple.com/content/catalogs/index-1.sucatalog&lt;/string&gt;
    &lt;string&gt;http://swscan.apple.com/content/catalogs/others/index-leopard.merged-1.sucatalog&lt;/string&gt;
    &lt;string&gt;http://swscan.apple.com/content/catalogs/others/index-leopard-snowleopard.merged-1.sucatalog&lt;/string&gt;
    &lt;string&gt;http://swscan.apple.com/content/catalogs/others/index-lion-snowleopard-leopard.merged-1.sucatalog&lt;/string&gt;
    &lt;string&gt;http://swscan.apple.com/content/catalogs/others/index-mountainlion-lion-snowleopard-leopard.merged-1.sucatalog&lt;/string&gt;
    &lt;string&gt;https://swscan.apple.com/content/catalogs/others/index-10.9-mountainlion-lion-snowleopard-leopard.merged-1.sucatalog&lt;/string&gt;
    &lt;string&gt;https://swscan.apple.com/content/catalogs/others/index-10.10-10.9-mountainlion-lion-snowleopard-leopard.merged-1.sucatalog&lt;/string&gt;
&lt;/array&gt;
</code></pre></div></div>

<p>After you add the new catalogs, run sync again</p>

<p><code class="language-plaintext highlighter-rouge">/Volumes/Data/Virtualization/SUS/reposado/code/repo_sync</code></p>

<p>Note that supporting up to 10.10 Yosemite takes about 300GB of space</p>

<p><img src="/assets/images/retro-tech/software-update-server/003-Reposado.png" alt="Retro Software Update Server" /></p>

<p><strong>Some Final Things</strong></p>

<p>Basically, after you complete the sync, you never need to run Reposado again. The
webserver and the <code class="language-plaintext highlighter-rouge">www</code> folder are all you need. The Software Update server is
based off of a completely static system, which is super nice and reliable.</p>

<p>If you change the hostname of the server Mac, you can update the
Preferences.plist file and then run sync again, and it won’t download any new
files, but at the end Reposado will update the catalog files to use your new
hostname which is fantastic.</p>

<h3 id="6-configure-the-retro-mac-to-fetch-updates-from-your-server-mac">6. Configure the retro Mac to fetch updates from your server Mac</h3>

<p>So this is a bit tricky, because it’s likely that your retro Mac(s) have already
run all of their software updates. So when you tell them to check for updates
from your new Software Update Server Mirror, the retro Mac will still tell you
there are no updates available. So how do you test?</p>

<ul>
  <li>If you don’t mind erasing your retro Mac, you could just reinstall the OS.</li>
  <li>Install a fresh OS to an external FireWire hard drive and boot from that.</li>
  <li>Install an old version of OS X in a Virtual Machine and try that.</li>
</ul>

<p><strong>Configure the Retro Mac</strong></p>

<p>All of these have their pros and cons so you decide. But once you get the Mac
working and it is ready for software updates, run the following command in the
terminal on the retro Mac</p>

<p><code class="language-plaintext highlighter-rouge">sudo defaults write /Library/Preferences/com.apple.SoftwareUpdate CatalogURL "http://Server-Bonjour-Name.local/content/catalogs/others/index-lion-snowleopard-leopard.merged-1.sucatalog"</code></p>

<p>Note that you have to point the OS at the correct catalog given the version of
OS X you are running or else it won’t see all of the updates.</p>

<p><strong>Tail the Apache Access Logs on the Server Mac</strong></p>

<p>Tailing these logs will show you the retro Mac is checking all the updates.</p>

<p><code class="language-plaintext highlighter-rouge">tail -f /var/log/apache2/access_log /var/log/apache2/error_log</code></p>

<p><strong>Check for Updates on the Retro Mac</strong></p>

<p>Check for updates on your retro Mac and install them. If it’s a fresh install, it
may take several reboots to get through all the updates.</p>

<p><code class="language-plaintext highlighter-rouge">Apple Menu→Software Update</code></p>

<p><strong>What Success Looks Like</strong></p>

<p>In the logs on the server Mac, you should see a lot of access. Like hundreds of
files to check for updates. On the retro Mac, in the title of the Software
Update window you should see the hostname of your server Mac in parentheses. See
the screenshot below.</p>

<p><img src="/assets/images/retro-tech/software-update-server/001-Title.png" alt="Retro Mac Configured" /></p>

<p><strong>Some Final Things</strong></p>

<p>In the real software update server, Apache rewrite rules are used so any version
can fetch index.sucatalog and the server will smartly rewrite the URL to be the
correct one. You can add these if you like, but since you’re probably not
running an army of retro Macs, it’s probably easier to just do it on the retro
Mac instead. Here are the rewrite rules if you are interested.</p>

<div class="language-plaintext highlighter-rouge"><div class="highlight"><pre class="highlight"><code>RewriteEngine On
RewriteCond %{HTTP_USER_AGENT} Darwin/9
RewriteRule ^/index\.sucatalog$ /index-leopard.merged-1.sucatalog
RewriteCond %{HTTP_USER_AGENT} Darwin/10
RewriteRule ^/index\.sucatalog$ /index-leopard-snowleopard.merged-1.sucatalog
RewriteCond %{HTTP_USER_AGENT} Darwin/11
RewriteRule ^/index\.sucatalog$ /index-lion-snowleopard-leopard.merged-1.sucatalog
</code></pre></div></div>]]></content><author><name></name></author><category term="Retro-Tech" /><category term="PowerPC" /><category term="Mac-OS-X" /><category term="Software-Update" /><category term="Hobby" /><summary type="html"><![CDATA[A guide to setting up an Apple Software Update Server mirror in case Apple ever shuts down the old Mac OS X update servers.]]></summary></entry><entry><title type="html">Retro Stream Tutorial</title><link href="https://jeffburg.com/retro-tech/2025/08/17/Retro-Stream-Tutorial.html" rel="alternate" type="text/html" title="Retro Stream Tutorial" /><published>2025-08-17T00:00:00+00:00</published><updated>2025-08-17T00:00:00+00:00</updated><id>https://jeffburg.com/retro-tech/2025/08/17/Retro-Stream-Tutorial</id><content type="html" xml:base="https://jeffburg.com/retro-tech/2025/08/17/Retro-Stream-Tutorial.html"><![CDATA[<p>A tutorial on how to stream YouTube or any other video content to PowerPC Macs.
To see a video of the kind of quality you can expect,
<a href="https://drive.google.com/file/d/13i3V9a7xyKCAwo0-r4rAtxuz6pWQDmoB/view?usp=sharing">check this recording</a>
on my Google Drive. I have noticed that the streaming quality from Google 
Drive directly is not always great, so download it to be sure you are seeing 
the full quality.</p>

<h2 id="table-of-contents">Table of Contents</h2>

<ul id="markdown-toc">
  <li><a href="#table-of-contents" id="markdown-toc-table-of-contents">Table of Contents</a></li>
  <li><a href="#who-am-i" id="markdown-toc-who-am-i">Who Am I</a>    <ul>
      <li><a href="#my-imac-g4-lamps-plus" id="markdown-toc-my-imac-g4-lamps-plus">My iMac G4 (Lamps Plus)</a></li>
    </ul>
  </li>
  <li><a href="#background" id="markdown-toc-background">Background</a>    <ul>
      <li><a href="#why-cant-old-computers-play-youtube" id="markdown-toc-why-cant-old-computers-play-youtube">Why Can’t Old Computers Play YouTube</a></li>
      <li><a href="#how-to-stream-high-quality-video-on-a-powerpc-mac" id="markdown-toc-how-to-stream-high-quality-video-on-a-powerpc-mac">How to Stream High Quality Video on a PowerPC Mac</a></li>
      <li><a href="#known-limitations" id="markdown-toc-known-limitations">Known Limitations</a>        <ul>
          <li><a href="#video-quality" id="markdown-toc-video-quality">Video Quality:</a></li>
          <li><a href="#audio-quality" id="markdown-toc-audio-quality">Audio Quality</a></li>
        </ul>
      </li>
      <li><a href="#system-requirements" id="markdown-toc-system-requirements">System Requirements</a>        <ul>
          <li><a href="#my-setup" id="markdown-toc-my-setup">My Setup</a></li>
        </ul>
      </li>
      <li><a href="#tools" id="markdown-toc-tools">Tools</a></li>
      <li><a href="#why-use-a-virtual-machine" id="markdown-toc-why-use-a-virtual-machine">Why Use a Virtual Machine</a></li>
    </ul>
  </li>
  <li><a href="#tutorial" id="markdown-toc-tutorial">Tutorial</a>    <ul>
      <li><a href="#step-1-prepare-your-virtual-machine" id="markdown-toc-step-1-prepare-your-virtual-machine">Step 1: Prepare your Virtual Machine</a></li>
      <li><a href="#step-2-install-updates" id="markdown-toc-step-2-install-updates">Step 2: Install Updates</a></li>
      <li><a href="#step-3-install-ffmpeg" id="markdown-toc-step-3-install-ffmpeg">Step 3: Install FFMPEG</a></li>
      <li><a href="#step-4-test-video-streaming-to-your-apple-silicon-mac" id="markdown-toc-step-4-test-video-streaming-to-your-apple-silicon-mac">Step 4: Test Video Streaming to your Apple Silicon Mac</a></li>
      <li><a href="#step-5-prepare-the-powerpc-mac" id="markdown-toc-step-5-prepare-the-powerpc-mac">Step 5: Prepare the PowerPC Mac</a></li>
      <li><a href="#congratulations" id="markdown-toc-congratulations">🥳Congratulations🎉</a></li>
    </ul>
  </li>
  <li><a href="#optimize-playback-performance" id="markdown-toc-optimize-playback-performance">Optimize Playback Performance</a>    <ul>
      <li><a href="#high-quality-ffmpeg-command" id="markdown-toc-high-quality-ffmpeg-command">High Quality FFMPEG Command</a>        <ul>
          <li><a href="#ffmpeg-command-explanation" id="markdown-toc-ffmpeg-command-explanation">FFMPEG Command Explanation</a></li>
        </ul>
      </li>
      <li><a href="#modifying-ffmpeg-commands" id="markdown-toc-modifying-ffmpeg-commands">Modifying FFMPEG Commands</a></li>
    </ul>
  </li>
  <li><a href="#faq" id="markdown-toc-faq">FAQ</a></li>
  <li><a href="#advanced" id="markdown-toc-advanced">Advanced</a>    <ul>
      <li><a href="#ffmpeg-multi-stream" id="markdown-toc-ffmpeg-multi-stream">FFMPEG Multi-Stream</a></li>
      <li><a href="#set-exact-resolution-in-debian" id="markdown-toc-set-exact-resolution-in-debian">Set Exact Resolution in Debian</a>        <ul>
          <li><a href="#how-to-set-the-resolution-manually-on-the-debian-vm" id="markdown-toc-how-to-set-the-resolution-manually-on-the-debian-vm">How to Set the Resolution Manually on the Debian VM</a></li>
        </ul>
      </li>
      <li><a href="#reduce-system-requirements-of-the-vm" id="markdown-toc-reduce-system-requirements-of-the-vm">Reduce System Requirements of the VM</a></li>
    </ul>
  </li>
</ul>

<h2 id="who-am-i">Who Am I</h2>

<p>I’m Jeff, a fan of Mac OS X, NeXT, a software developer, and general retro tech
enthusiast. I have other retro tech guides as well as software I have developed
for retro Macs, so please check it out.</p>

<ul>
  <li><a href="https://github.com/jeffreybergier/MathEdit">MathEdit for OpenStep</a>
    <ul>
      <li><a href="https://jeffburg.social/tags/OpenStep">MathEdit Development Posts on my Mastodon</a></li>
    </ul>
  </li>
  <li><a href="/retro-tech/2025/09/09/Retro-Software-Update-Server.html">Retro Software Update Server</a></li>
  <li><a href="https://jeffburg.social/tags/iMacG4">iMac G4 Posts on my Mastodon</a></li>
  <li><a href="https://jeffburg.social/tags/iMac5K">Homemade iMac 5K Monitor posts on my Mastodon</a></li>
</ul>

<h3 id="my-imac-g4-lamps-plus">My iMac G4 (Lamps Plus)</h3>

<p>I recently got an iMac G4 and restored it with SSD and max RAM. I got this
machine because when I was in High School I desperately wanted one but could
never get it. But I didn’t want to get it if it was going to sit on a shelf and
collect dust.</p>

<p>So before I bought it I tried this streaming setup to make sure it could work.
And I am very happy to report that I am happy with the results and this machine
now makes a great music video display for my KPOP listening enjoyment while I’m
working.</p>

<h2 id="background">Background</h2>

<p>I am writing this in 2025 and I would say that it has been a good 10 years
since pretty much any computing device we may have can easily stream
1080p and 4K content directly from the internet with absolutely no issues.</p>

<p>However, before 2015, this was not always the case. I will paste in specs
for the iPhone 5 and the original iPhone. You can see from the specs that 
even with special decoding hardware, the iPhone could only do 480p H.264.</p>

<p>iPhone 5 - 2012 (<a href="https://everymac.com/systems/apple/iphone/specs/apple-iphone-5-a1428-gsm-lte-4-17-north-america-specs.html">Source</a>):</p>
<blockquote>
  <p>H.264 video up to 1080p, 30 frames per second</p>
</blockquote>

<p>iPhone - 2007 (<a href="https://everymac.com/systems/apple/iphone/specs/apple-iphone-specs.html">Source</a>)</p>
<blockquote>
  <p>H.264 video, up to 1.5 Mbps, <strong>640 by 480 pixels</strong>, 30 frames per second, 
Low-Complexity version of the H.264 Baseline Profile</p>
</blockquote>

<p>As another anecdote, I remember having a <a href="https://everymac.com/systems/apple/powerbook_g4/specs/powerbook_g4_1.67_15_hr.html">1.67GHz PowerBook G4</a>
from late 2005 and being super amazed that it could rip DVDs into MPEG4
format (not H.264 yet) at 1x meaning that it ONLY took 2 hours to rip a 2 hour 
DVD. This was incredible speed during this era.</p>

<p>So while we may feel like high-quality YouTube video playback has been a given
forever, it actually has not. And so when we use old Macs we may get
frustrated by their inability to do “simple” tasks like play YouTube. But the
reason I am giving this background is to illustrate that this is no simple task.</p>

<h3 id="why-cant-old-computers-play-youtube">Why Can’t Old Computers Play YouTube</h3>

<p>1) <strong><a href="https://oldvcr.blogspot.com/2020/11/fun-with-crypto-ancienne-tls-for.html">The TLS Apocalypse</a></strong>: 
Means PowerPC Macs can’t connect to YouTube at all.</p>

<ul>
  <li>A few years ago, there was a big push for web servers to
disable support for TLSv1.1 because there were fundamental flaws found in
its cryptography. However, on pretty much any system older than 2015, 
TLS v1.2 is not supported. If the web were working as expected, then these
systems would just negotiate a TLSv1.1 or v1.0 connection. Hell, even 
start the connection with no TLS for 90’s system. But basically the entire
internet decided that just rejecting the connection all together was better
than allowing an insecure connection. So now what you see is any Mac running
an OS older than macOS 10.9 Mavericks (2013), basically can’t browse the
internet at all.</li>
</ul>

<p>2) <strong>H.264 is too Sophisticated</strong>: Even if these Macs could connect to YouTube,
H.264 is such a computationally intensive codec, that these old Macs can
barely play back postage stamp sized video in H.264.</p>

<ul>
  <li>H.264 was such a huge success because it meant extremely high quality 
videos used very little bandwidth compared to its predecessors like Xvid
and MPEG2. So while old Macs have not much trouble with MPEG1, MPEG2, and Xvid,
we never got high quality videos back in the day because there was not
enough bandwidth on the internet to get quality video out of these codecs.</li>
</ul>

<h3 id="how-to-stream-high-quality-video-on-a-powerpc-mac">How to Stream High Quality Video on a PowerPC Mac</h3>

<p>We are basically going to use the fact that we have a local high speed ethernet
network that our PowerPC Mac sits on to stream an incredibly high bit rate
yet simple to decode video codec like MPEG1, MPEG2, or Xvid. We are going 
to use so much bandwidth that even a modern internet connection would have 
trouble streaming this video over the internet (10+Mbps).</p>

<p>The approach replaces the limited CPU power of PowerPC Macs and replaces it
with tons of bandwidth which they can handle thanks to their 10/100Mbps
ethernet ports.</p>

<h3 id="known-limitations">Known Limitations</h3>

<h4 id="video-quality">Video Quality:</h4>

<p>I want to be clear here that we are not going to get beautiful 4K content
playing on our PowerPC Macs. They just do not have enough power. But depending
on the system you have you will probably at least get:</p>

<ul>
  <li>720p video (480p on Tiger)
    <ul>
      <li>1080p may be possible on fast G4s and G5s</li>
    </ul>
  </li>
  <li>20-30FPS</li>
  <li>Decently clear picture without too many blocky compression artifacts</li>
</ul>

<h4 id="audio-quality">Audio Quality</h4>

<p>Audio quality is excellent. We get full AAC 192k or MP3 320k at 44,100Hz with
no issues. However, disabling audio will let you get higher video quality.
So if you are OK using your Apple Silicon Mac as the audio output device
(which may be preferred if you use AirPods for example), then you can push
the video codec further.</p>

<h3 id="system-requirements">System Requirements</h3>

<ol>
  <li>PowerPC Mac running at least Mac OS X 10.4 Tiger (10.5 Leopard preferred)
    <ol>
      <li>What about Jaguar? <a href="https://www.videolan.org/vlc/download-macosx.html">VLC claims</a> 
they have a version that supports 10.2 Jaguar but when I launched it on 
10.2.8 it just crashed and I didn’t try to troubleshoot at all. But 
theoretically this would work on any version of OS X if you could get 
VLC to start.</li>
      <li>Why is Leopard preferred? In the many hours of testing I have done, 
Leopard seems to have a better networking stack that can handle 10+Mbps
onslaught of UDP packets we are going to throw at the system. I was able
to get almost double the resolution in Leopard (1152x720p) than I was
able to in Tiger. But Tiger still works fine, just lower quality.</li>
    </ol>
  </li>
  <li>PowerPC Mac connected to your home network over ethernet: Sorry, the Airport
cards on these old Macs are too slow for this.</li>
  <li>Apple Silicon Mac: This will be the streaming server. Theoretically, any 
computer that runs FFMPEG could be the streaming server. But this tutorial 
is for Apple Silicon Macs.</li>
</ol>

<h4 id="my-setup">My Setup</h4>

<ul>
  <li><a href="https://everymac.com/systems/apple/imac/specs/imac_1.0_17_fp.html">iMac (Flat Panel 17-inch, 1GHz)</a> from 2003 with SSD and 1.5GB RAM Upgrade</li>
  <li><a href="https://everymac.com/systems/apple/macbook-air/specs/macbook-air-m1-8-core-8-core-gpu-13-retina-display-2020-specs.html">MacBook Air (2020)</a> with M1 Chip and 16GB of RAM</li>
</ul>

<h3 id="tools">Tools</h3>

<ol>
  <li><a href="https://mac.getutm.app">UTM</a> - A UI wrapper around the venerable QEMU virtualization and emulation tool</li>
  <li><a href="https://www.debian.org">Debian 12</a> - You can use any Linux you like, but I found Debian 12 to be easiest</li>
  <li><a href="https://ffmpeg.org">FFMPEG</a> - The one-stop-shop for all video encoding and decoding</li>
  <li><a href="https://www.videolan.org/vlc/download-macosx.html">VLC</a> - The one-stop-shop for all video playback on OS X for 25 years</li>
</ol>

<h3 id="why-use-a-virtual-machine">Why Use a Virtual Machine</h3>

<p>The <a href="https://github.com/jeffreybergier/Retro-Stream-Tutorial/blob/main/README-MacVM.md">original version of this tutorial</a> was entirely Mac-based;
however, I still used a VM because AVFoundation only lets FFMPEG capture
entire screens and I thought it was not very convenient to give up a whole
monitor for streaming. But primarily, there is some sort of bug in FFMPEG that makes
capturing high quality audio via AVFoundation not work properly. I think it’s
<a href="https://trac.ffmpeg.org/ticket/11398">Bug #11398</a> but I’m not sure.</p>

<p>But as could be expected, FFMPEG works great with Linux. That said, I spent many
hours troubleshooting and I found some critical things you need from
your Linux Video Streaming Server. This tutorial is the easiest way I found to
do this. But you can use your own Linux server as long as:</p>

<ul>
  <li>It runs X11: This is not the default for many years, but Ubuntu 25.10 drops X11 entirely</li>
  <li>It runs Pipewire 1.4.2: Debian 12 by default runs a very old version of Pipewire and it does not work properly for this streaming setup</li>
  <li>It supports hardware GPU acceleration</li>
</ul>

<h2 id="tutorial">Tutorial</h2>

<p>I tried to add as many screenshots as possible. So if you are getting lost, 
use Command+F and search for “Screenshot” to highlight all of the screenshot 
links in the tutorial.</p>

<p>Also note that if you use the Debian VM image I link below, then copy and paste
works between the Host Mac and the VM Linux. However, remember that Linux uses
the Control key instead of Command. Also, the terminal in Linux uses
Control + Shift + C and Control + Shift + V.</p>

<h3 id="step-1-prepare-your-virtual-machine">Step 1: Prepare your Virtual Machine</h3>

<ol>
  <li>Install <a href="https://mac.getutm.app">UTM</a></li>
  <li>Open UTM - <a href="/assets/images/retro-tech/retro-stream-tutorial/050-Debian/01-UTM-Blank.png">Screenshot</a></li>
  <li>Download the <a href="https://mac.getutm.app/gallery/debian-12">Debian 12</a> image for UTM</li>
  <li>Choose a place on your hard drive you want the VM image to live and move it there</li>
  <li>Extract the Zip file - <a href="/assets/images/retro-tech/retro-stream-tutorial/050-Debian/02-Debian-Extract.png">Screenshot</a></li>
  <li>Double click to open it in UTM - <a href="/assets/images/retro-tech/retro-stream-tutorial/050-Debian/03-Debian-Open.png">Screenshot</a></li>
  <li>Click the “Edit Selected VM” in the toolbar at the top right of the UTM window
    <ol>
      <li>[Required] In Network change the “Network Mode” to Bridged - <a href="/assets/images/retro-tech/retro-stream-tutorial/050-Debian/04-UTM-Network.png">Screenshot</a></li>
      <li>[Optional] In Display uncheck “Resize display to window size automatically” - <a href="/assets/images/retro-tech/retro-stream-tutorial/050-Debian/05-UTM-Resolution.png">Screenshot</a>
        <ol>
          <li>This is a nice feature normally, but for our streaming server we never want the resolution to change</li>
        </ol>
      </li>
      <li>[Optional] In USB Drive delete the USB CD-ROM Drive: We won’t use it - <a href="/assets/images/retro-tech/retro-stream-tutorial/050-Debian/06-UTM-CD.png">Screenshot</a></li>
      <li>[Optional] In Sharing change the “Directory Sharing Mode” to None: We won’t need to share files - <a href="/assets/images/retro-tech/retro-stream-tutorial/050-Debian/07-UTM-Sharing.png">Screenshot</a></li>
    </ol>
  </li>
  <li>Boot up your VM</li>
  <li>[Required] At the login window change to 1 of the Xorg (X11) options - <a href="/assets/images/retro-tech/retro-stream-tutorial/050-Debian/08-Settings-X11.png">Screenshot</a>
    <ol>
      <li>Username and Password are both <code class="language-plaintext highlighter-rouge">debian</code></li>
    </ol>
  </li>
  <li>[Optional] Open the Settings app and change the following
    <ol>
      <li>[Optional] Privacy→Screen - Disable screen blanking - <a href="/assets/images/retro-tech/retro-stream-tutorial/050-Debian/09-Settings-ScreenBlank.png">Screenshot</a></li>
      <li>[Optional] Users - Enable Automatic Login - <a href="/assets/images/retro-tech/retro-stream-tutorial/050-Debian/10-Settings-Login.png">Screenshot</a></li>
      <li>[Optional] Appearance - Enable Dark Mode - <a href="/assets/images/retro-tech/retro-stream-tutorial/050-Debian/11-Settings-Appearance.png">Screenshot</a></li>
      <li>[Optional] Date&amp;Time - Set your time zone - <a href="/assets/images/retro-tech/retro-stream-tutorial/050-Debian/12-Settings-TimeZone.png">Screenshot</a></li>
      <li>[Optional] Keyboard - Add your keyboard if you don’t use a US keyboard - <a href="/assets/images/retro-tech/retro-stream-tutorial/050-Debian/13-Settings-Keyboard.png">Screenshot</a></li>
      <li>[Optional] Mouse&amp;Keyboard - Enable Natural Scrolling - <a href="/assets/images/retro-tech/retro-stream-tutorial/050-Debian/14-Settings-Scrolling.png">Screenshot</a>
        <ol>
          <li>If you are a Mac user you are probably used to natural scrolling at this point (no judgement 🤣)</li>
        </ol>
      </li>
      <li>[Optional] Sharing - Change the system name - <a href="/assets/images/retro-tech/retro-stream-tutorial/050-Debian/15-Settings-Name.png">Screenshot</a>
        <ol>
          <li>If you want to use SSH to login to the VM: <code class="language-plaintext highlighter-rouge">ssh debian@Chosen-Sharing-Name.local</code></li>
        </ol>
      </li>
    </ol>
  </li>
  <li>Open Firefox and browse to YouTube to ensure your network and sound are working</li>
  <li>Open Terminal and ping a Mac on your network (preferably not the host Mac) - <code class="language-plaintext highlighter-rouge">ping Retro-Mac-Bonjour-Name.local</code>
    <ol>
      <li>If the host is not reachable then there is a network issue (probably not bridged)</li>
    </ol>
  </li>
</ol>

<h3 id="step-2-install-updates">Step 2: Install Updates</h3>

<p>Sorry, some of these steps say to use <code class="language-plaintext highlighter-rouge">vi</code> in the terminal. You may need to 
look up how to use this text editor, it’s not easy. If there is another text
editor you already know how to use like <code class="language-plaintext highlighter-rouge">nano</code> feel free to use that instead.</p>

<p><strong>Install Updates from Debian Backports</strong></p>

<p>Debian 12 has many quite old pieces of software because Debian tries to maintain
a reputation of being stable. But they also offer “backports” which will install
newer versions of packages to your system. Specifically we need a much newer
version of Pipewire which is the audio system in Linux that FFMPEG will capture
from.</p>

<p><code class="language-plaintext highlighter-rouge">sudo vi /etc/apt/sources.list</code></p>

<p>At the bottom of the file, paste the following</p>

<p><code class="language-plaintext highlighter-rouge">deb http://deb.debian.org/debian bookworm-backports main contrib non-free</code></p>

<p>Save the file and exit, then update apt</p>

<p><code class="language-plaintext highlighter-rouge">sudo apt update</code></p>

<p>Now we need to tell apt to install all of the backport updates. This will tell
you there are 400+ updates needed, just confirm Yes. Note that it may present
some text files that give you info about the updates. If those appear, press <code class="language-plaintext highlighter-rouge">q</code>
to exit and allow the updates to install.</p>

<p><code class="language-plaintext highlighter-rouge">sudo apt -t bookworm-backports upgrade</code></p>

<p>Now we need to update any remaining updates</p>

<p><code class="language-plaintext highlighter-rouge">sudo apt upgrade</code></p>

<p>Now you can test to make sure a new version of pipewire is installed. The
version should be 1.4.2 but if it’s below 1, then we have a problem.</p>

<p><code class="language-plaintext highlighter-rouge">pipewire --version</code></p>

<p>Now you can restart the system</p>

<p><code class="language-plaintext highlighter-rouge">sudo shutdown -r now</code></p>

<h3 id="step-3-install-ffmpeg">Step 3: Install FFMPEG</h3>

<p>FFMPEG is a legendary tool for video and audio encoding, decoding, and 
streaming. In this tutorial I will probably only cover 1% of its functionality.
However, it gives us the power to tweak everything so we can stream to our
Retro Mac with unexpectedly good quality.</p>

<p><code class="language-plaintext highlighter-rouge">sudo apt install ffmpeg pulseaudio-utils</code></p>

<p>Set the default Pipewire audio capture device to be the “monitor”. The default
capture device is usually the microphone, which makes sense, but is also not
what we want. I will give you the specific commands for my system, but be
careful to make sure the long names with numbers all match your system.</p>

<p><code class="language-plaintext highlighter-rouge">pactl list short sources</code></p>

<p>Now set the default to the device that ends in “monitor”. Again, make sure
the name you type in matches your system if it happens to be different from
mine.</p>

<p><code class="language-plaintext highlighter-rouge">pactl set-default-source alsa_output.pci-0000_00_03.0.analog-stereo.monitor</code></p>

<h3 id="step-4-test-video-streaming-to-your-apple-silicon-mac">Step 4: Test Video Streaming to your Apple Silicon Mac</h3>

<p>Because the Retro Mac might have other problems we can’t control, first we are
going to try to stream video from the VM directly to your Apple Silicon
Mac Host. This will let us know the video streaming is working without worrying
about 20+ year old hardware and software.</p>

<p><strong>On the Host</strong></p>

<ol>
  <li>[Host] <a href="https://www.videolan.org/vlc/download-macosx.html">Install VLC</a></li>
  <li>[Host] Open VLC and choose File→Open Network… and type in <code class="language-plaintext highlighter-rouge">udp://@:1234</code> - <a href="/assets/images/retro-tech/retro-stream-tutorial/050-Debian/16-VLC-Open.png">Screenshot</a></li>
  <li>[Host] Now the host is waiting for a UDP stream from the VM</li>
</ol>

<p><strong>On the VM</strong></p>

<p>Open terminal and paste the following. I’ll explain the options later. But for
now the only thing you need to change is the bonjour name on the last line.</p>

<div class="language-plaintext highlighter-rouge"><div class="highlight"><pre class="highlight"><code>ffmpeg \
  -f x11grab -framerate 20 -draw_mouse 0 -i $DISPLAY \
  -f pulse -i default \
  -c:v mpeg4 -qscale:v 5 -vtag XVID \
  -c:a aac -b:a 192k -ac 2 -ar 44100 \
  -vf "scale=640x400" \
  -f mpegts "udp://Host-Mac-Bonjour-Name.local:1234?pkt_size=1316"
</code></pre></div></div>

<p>You should see that VLC on the host Mac is now playing video of the terminal on
the VM. So on the VM you can open Firefox and play a YouTube video. If the sound
comes through twice, then mute the audio in the VM by clicking on the menu item
at the top right of the screen.</p>

<p>To end the stream, type <code class="language-plaintext highlighter-rouge">q</code> in the terminal of the VM.</p>

<p><img src="/assets/images/retro-tech/retro-stream-tutorial/050-Debian/17-VLC-Success.png" alt="Success Screenshot" /></p>

<h3 id="step-5-prepare-the-powerpc-mac">Step 5: Prepare the PowerPC Mac</h3>

<p>Note that for Leopard, the VLC website says you can use VLC 2.0.10 but I found
this version to have terrible performance. A search online revealed the same
thing. Instead you should use the newest version of 1.0 that you can find. 
Credit to <a href="https://powerpcliberation.blogspot.com/2012/08/video-on-powerpc-playback-on-g4g5.html">PowerPC Liberation: Video on PowerPC: Part 1 - Playback on G4/G5</a></p>

<p>Note that due to the <a href="https://oldvcr.blogspot.com/2020/11/fun-with-crypto-ancienne-tls-for.html">The TLS Apocalypse</a>
mentioned above, you will almost certainly not be able to download these 
directly on the PowerPC Mac. Instead you will need to download them on your
modern Mac and then transfer them over file sharing.</p>

<p><strong>Install VLC on your Retro Mac</strong></p>

<ol>
  <li>On the Apple Silicon Mac: Download an old version of VLC
    <ol>
      <li>Leopard: <a href="https://www.macintoshrepository.org/11636-vlc-media-player">VLC 1.1.12 from Macintosh Repository</a> - <a href="/assets/images/retro-tech/retro-stream-tutorial/040-PPC/01-PPC-Download-Leopard.png">Screenshot</a></li>
      <li>Tiger: <a href="https://www.videolan.org/vlc/download-macosx.html">VLC 0.9.10 from VLC Website</a> - <a href="/assets/images/retro-tech/retro-stream-tutorial/040-PPC/02-PPC-Download-Tiger.png">Screenshot</a></li>
      <li>Transfer the downloaded file to the PowerPC Mac via File Sharing
        <ol>
          <li>New Macs can still connect to the AFP servers on old versions of OS X.</li>
        </ol>
      </li>
    </ol>
  </li>
  <li>On the PowerPC Mac: Install and run VLC
    <ol>
      <li><a href="/assets/images/retro-tech/retro-stream-tutorial/040-PPC/03-PPC-VLC-Leopard.png">Leopard Screenshot</a></li>
      <li><a href="/assets/images/retro-tech/retro-stream-tutorial/040-PPC/04-PPC-VLC-Tiger.png">Tiger Screenshot</a></li>
    </ol>
  </li>
  <li>On the PowerPC Mac: Get the Bonjour Name
    <ol>
      <li>Note that this <a href="https://www.mactech.com/2004/07/22/apple-to-change-rendezvous-name-in-settlement/">used to be called Rendezvous</a>. 
So you might see that name used instead of Bonjour in the UI.</li>
      <li>System Preferences→Sharing - <a href="/assets/images/retro-tech/retro-stream-tutorial/040-PPC/05-PPC-Bonjour-Leopard.png">Leopard Screenshot</a></li>
      <li>System Preferences→Sharing - <a href="/assets/images/retro-tech/retro-stream-tutorial/040-PPC/06-PPC-Bonjour-Tiger.png">Tiger Screenshot</a></li>
    </ol>
  </li>
  <li>On the PowerPC Mac: Open VLC and choose File→Open Network - type <code class="language-plaintext highlighter-rouge">udp://@:1234</code> - <a href="/assets/images/retro-tech/retro-stream-tutorial/040-PPC/07-PPC-VLC-Open.png">Screenshot</a>
    <ol>
      <li>Your PowerPC Mac is now waiting for the stream to start</li>
    </ol>
  </li>
  <li>(Optional) On the PowerPC Mac: Save the playlist for easy opening later - <a href="/assets/images/retro-tech/retro-stream-tutorial/040-PPC/09-PPC-VLC-Save.png">Screenshot</a></li>
</ol>

<p><strong>Start the Video Stream in the Linux VM</strong></p>

<p>In the terminal paste the following. Note this is an extremely low quality 
stream. We are just making sure it works. We will optimize later.</p>

<div class="language-plaintext highlighter-rouge"><div class="highlight"><pre class="highlight"><code>ffmpeg \
  -f x11grab -framerate 20 -draw_mouse 0 -i $DISPLAY \
  -f pulse -i default \
  -c:v mpeg4 -qscale:v 10 -vtag XVID \
  -c:a aac -b:a 192k -ac 2 -ar 44100 \
  -vf "scale=640x400" \
  -f mpegts "udp://Your-Retro-Mac-Bonjour-Name.local:1234?pkt_size=1316"
</code></pre></div></div>

<h3 id="congratulations">🥳Congratulations🎉</h3>

<p>You have a successful streaming setup completed. Now it’s time to optimize
playback performance for your PowerPC Mac</p>

<h2 id="optimize-playback-performance">Optimize Playback Performance</h2>

<p>All of my testing was done on my 1GHz iMac G4. But if you have a more powerful
Mac, you can get more bandwidth and quality out of it. Likewise, if you have 
a slower Mac, you can reduce quality.</p>

<p>To increase the speed of debugging, know that you can press Q to quit the
FFMPEG server and then change the settings and restart it again. The PowerPC 
Mac will just pause until you restart FFMPEG. Note that you can only change 
minor settings like framerate and quality settings. If you change resolution 
or codecs, then you will need to stop the stream on the PowerPC Mac and 
restart it.</p>

<h3 id="high-quality-ffmpeg-command">High Quality FFMPEG Command</h3>

<p>Here is our example command which I find to have very good quality and performance
on the iMac G4 1GHz. But based on your specific Mac, you may want to change
these settings.</p>

<div class="language-plaintext highlighter-rouge"><div class="highlight"><pre class="highlight"><code>ffmpeg \
  -f x11grab -framerate 20 -draw_mouse 0 -i $DISPLAY \
  -f pulse -i default \
  -c:v mpeg4 -qscale:v 3 -vtag XVID \
  -c:a aac -b:a 192k -ac 2 -ar 44100 \
  -vf "eq=gamma=0.80,scale=1152x720" \
  -f mpegts "udp://Your-Retro-Mac-Bonjour-Name.local:1234?pkt_size=1316"
</code></pre></div></div>

<h4 id="ffmpeg-command-explanation">FFMPEG Command Explanation</h4>

<table>
  <thead>
    <tr>
      <th>Command</th>
      <th>Explanation</th>
    </tr>
  </thead>
  <tbody>
    <tr>
      <td><code class="language-plaintext highlighter-rouge">ffmpeg</code></td>
      <td> </td>
    </tr>
    <tr>
      <td><code class="language-plaintext highlighter-rouge">-f x11grab -framerate 20 -draw_mouse 0 -i $DISPLAY \</code></td>
      <td>This specifies the video input - Modify the framerate to find the right balance between quality and performance</td>
    </tr>
    <tr>
      <td><code class="language-plaintext highlighter-rouge">-f pulse -i default \</code></td>
      <td>This specifies the audio input - The default capture device we specified earlier in this tutorial</td>
    </tr>
    <tr>
      <td><code class="language-plaintext highlighter-rouge">-c:v mpeg4 -qscale:v 3 -vtag XVID \</code></td>
      <td>This specifies video codec (XVID) - Modify QSCALE from 1 (highest) to 31 (lowest) to find the right balance between quality and performance</td>
    </tr>
    <tr>
      <td><code class="language-plaintext highlighter-rouge">-c:a aac -b:a 192k -ac 2 -ar 44100 \</code></td>
      <td>This specifies the audio codec (AAC) - If your Mac has trouble with AAC, you can change to MP3</td>
    </tr>
    <tr>
      <td><code class="language-plaintext highlighter-rouge">-vf "eq=gamma=0.80,scale=1152x720" \</code></td>
      <td>This specifies the video filter - You can add many filters, but here we scale the video to be lower resolution and change the gamma to be darker (older Macs had a brighter gamma, so modern content can look washed out)</td>
    </tr>
    <tr>
      <td><code class="language-plaintext highlighter-rouge">-f mpegts "udp://Your-Retro-Mac-Bonjour-Name.local:1234?pkt_size=1316"</code></td>
      <td>This specifies the destination for the UDP stream (Your retro Mac)</td>
    </tr>
  </tbody>
</table>

<h3 id="modifying-ffmpeg-commands">Modifying FFMPEG Commands</h3>

<p>As FFMPEG is extremely complex, I highly recommend using ChatGPT or another LLM
to help you with FFMPEG. This is where I learned everything for FFMPEG. I only
use the free ChatGPT account and it’s perfectly adequate. For example, here is a
sample prompt and a screenshot of the response. You can see that it exactly
modified the one line that needed to change.</p>

<div class="language-plaintext highlighter-rouge"><div class="highlight"><pre class="highlight"><code>Hi, I need help with FFMPEG. I am using Debian 12 with Backports installed to
stream to an iMac G4 running Leopard and VLC. The iMac doesn't have much
processor power and so I am trying to optimize performance. I have this FFMPEG
command that streams in XVID and it plays pretty smoothly on my iMac, but I
want to try MPEG2. Can you update the command to use MPEG2?

ffmpeg \
  -f x11grab -framerate 20 -draw_mouse 0 -i $DISPLAY \
  -f pulse -i default \
  -c:v mpeg4 -qscale:v 3 -vtag XVID \
  -c:a aac -b:a 192k -ac 2 -ar 44100 \
  -vf "eq=gamma=0.80,scale=1152x720" \
  -f mpegts "udp://Your-Retro-Mac-Bonjour-Name.local:1234?pkt_size=1316"
</code></pre></div></div>

<p><img src="/assets/images/retro-tech/retro-stream-tutorial/050-Debian/18-ChatGPT-Codec.png" alt="ChatGPT Help" /></p>

<h2 id="faq">FAQ</h2>

<ol>
  <li>Isn’t this hard on a Retro Mac?
    <ol>
      <li>Yeah, this is very hard on your old Mac. My iMac G4 can do it for hours
with no stability challenges, but we are talking 100% CPU and many
gigabytes of network traffic.</li>
      <li>I think this is more of a philosophical question than a technical one. I
feel like these beautiful, powerful machines were meant to be used rather
than sitting on a shelf.</li>
    </ol>
  </li>
  <li>Won’t this slow down my Apple Silicon Mac?
    <ol>
      <li>I have the absolute slowest Apple Silicon Mac. It’s an M1 MacBook Air
with no fan. It’s true that this solution takes about 100% of 1 core of
the CPU. But I have not noticed any slow downs or throttling. This 
includes when I am using Xcode to develop software for iOS and Mac apps.</li>
    </ol>
  </li>
  <li>Can this be done without an Apple Silicon Mac?
    <ol>
      <li>Absolutely! The server could be any machine that runs FFMPEG which is 
pretty much any machine. I look forward to seeing a future tutorial that 
uses a Raspberry Pi 🍓</li>
      <li>I just created this tutorial using UTM and Apple Silicon because that’s
what I have. But there is no reason the exact same thing can’t be done 
with an Intel Mac and VMWare Fusion (which is free now by the way)</li>
    </ol>
  </li>
</ol>

<h2 id="advanced">Advanced</h2>

<h3 id="ffmpeg-multi-stream">FFMPEG Multi-Stream</h3>

<p>FFMPEG with MPEGTS streaming protocol can actually stream to multiple computers
at once over UDP. Why would you want to do this? Well, if you have a whole 
army of retro computers, you could have them all play the same video at once…
Or more likely, you are interested in using modern bluetooth audio options to
listen to the stream while using the retro Mac to display the content.</p>

<p>Unfortunately, this will not result in every computer playing in sync. The UDP
stream just flies out of the Linux VM and the client computers play it as
quickly as they can with no regard to each other.</p>

<p>What’s different in this command?</p>

<div class="language-plaintext highlighter-rouge"><div class="highlight"><pre class="highlight"><code>ffmpeg \
  -f x11grab -framerate 20 -draw_mouse 0 -i $DISPLAY \
  -f pulse -i default \
  -c:v mpeg4 -qscale:v 3 -vtag XVID \
  -c:a aac -b:a 192k -ac 2 -ar 44100 -async 1 \
  -vf "eq=gamma=0.80,scale=1152x720,tpad=start_duration=0" \
  -af "adelay=0|0" \
  -f mpegts "udp://Lamps-Plus.local:1234?pkt_size=1316" \
  -f mpegts "udp://Pinkinium.local:1234?pkt_size=1316"
</code></pre></div></div>

<ol>
  <li><code class="language-plaintext highlighter-rouge">-f mpegts</code> 2x - Specify as many destinations as you like</li>
  <li><code class="language-plaintext highlighter-rouge">-vf</code> - Added <code class="language-plaintext highlighter-rouge">tpad=start_duration=0</code> - Change the zero to a number in <strong>seconds</strong> to cause video to be delayed in order to aid with syncing</li>
  <li>
    <table>
      <tbody>
        <tr>
          <td><code class="language-plaintext highlighter-rouge">-af</code> - Added Audio Filter - <code class="language-plaintext highlighter-rouge">adelay=0|0"</code> - Change the 0</td>
          <td>0 to a number in <strong>milliseconds</strong> to cause audio to be delayed in order to aid with syncing. Each side of the</td>
          <td>is left and right channel, so the numbers should be the same.</td>
        </tr>
      </tbody>
    </table>
  </li>
</ol>

<h3 id="set-exact-resolution-in-debian">Set Exact Resolution in Debian</h3>

<p>The Debian VM boots to 1280x800 which is a pretty good resolution for a lot of
retro Macs as long as they are widescreen. However, you may want to set the
virtual machine to a different resolution. This can be done pretty easily in
the Settings app under Displays. However, not all resolutions are in there.
Also, all of those resolutions are at 60Hz which makes sense because that’s
a typical desktop refresh rate. So why would you want to change the resolution?</p>

<ol>
  <li>Using the -vf scale option is actually kind of compute intensive because
FFMPEG has to scale the video before sending it over the wire</li>
  <li>60Hz is likely way faster than your Retro Mac will be able to render. So this
is also wasting performance of the Virtual Machine and the Host Mac.</li>
</ol>

<h4 id="how-to-set-the-resolution-manually-on-the-debian-vm">How to Set the Resolution Manually on the Debian VM</h4>

<p>Declare to the system which resolution you want</p>

<p><code class="language-plaintext highlighter-rouge">cvt 1152 720 30</code></p>

<p>The output will look something like this, and we are interested in the Modeline</p>

<div class="language-plaintext highlighter-rouge"><div class="highlight"><pre class="highlight"><code>debian@debian:~$ cvt 1152 720 30
# 1152x720 29.96 Hz (CVT) hsync: 22.05 kHz; pclk: 31.75 MHz
Modeline "1152x720_30.00"   31.75  1152 1184 1296 1440  720 723 729 736 -hsync +vsync
</code></pre></div></div>

<p>Add the resolution to the windowing system. Execute the 2 commands and make
sure the first one matches the Modeline output exactly.</p>

<div class="language-plaintext highlighter-rouge"><div class="highlight"><pre class="highlight"><code>xrandr --newmode "1152x720_30.00" 31.75 1152 1184 1296 1440 720 723 729 736 -hsync +vsync
xrandr --addmode Virtual-1 "1152x720_30.00"
</code></pre></div></div>

<p>Now set the resolution. After you run this command, the resolution should
change and the UTM window will resize.</p>

<p><code class="language-plaintext highlighter-rouge">xrandr --output Virtual-1 --mode "1152x720_30.00"</code></p>

<p>Now the issue is that this will not persist across reboots and you will have
to run these 3 commands every time. To fix that we need to save the monitor
configuration in X11.</p>

<div class="language-plaintext highlighter-rouge"><div class="highlight"><pre class="highlight"><code>sudo mkdir -p /etc/X11/xorg.conf.d
sudo vi /etc/X11/xorg.conf.d/10-monitor.conf
</code></pre></div></div>

<p>And put the text in the configuration file. Again, make sure the Modeline
matches exactly.</p>

<div class="language-plaintext highlighter-rouge"><div class="highlight"><pre class="highlight"><code>Section "Monitor"
    Identifier "Virtual-1"
    Modeline "1152x720_30.00" 31.75 1152 1184 1296 1440 720 723 729 736 -hsync +vsync
    Option "PreferredMode" "1152x720_30.00"
EndSection

Section "Screen"
    Identifier "Screen0"
    Monitor "Virtual-1"
    DefaultDepth 24
    SubSection "Display"
        Modes "1152x720_30.00"
    EndSubSection
EndSection
</code></pre></div></div>

<p>Now when you restart, it should boot into the resolution you specified. Note
that it will have 3 resolutions during boot. The basic 800x600 used by Grub,
then it resizes to 1280x800 as the default resolution before X11 starts up, and
then when you get to the login screen or the desktop, it will resize to your
selected resolution.</p>

<h3 id="reduce-system-requirements-of-the-vm">Reduce System Requirements of the VM</h3>

<p>After you get everything working, and you know everything works smoothly
and without hiccups most of the time, then you can reduce the amount of 
resources the VM is allowed to use. By default it’s 4 cores and 4GB of RAM.</p>

<p>When you have your streaming setup running, use HTOP to see how much RAM
and how much CPU is in use. HTOP does not come on Debian so you can install it.</p>

<div class="language-plaintext highlighter-rouge"><div class="highlight"><pre class="highlight"><code>sudo apt update
sudo apt install htop
htop
</code></pre></div></div>

<p>In my system, I found it rarely used more than 2GB of RAM and all 4 CPU cores
were at about 25% when streaming was running. So I decided to reduce the 
available resources to 2 Cores and 3GB of RAM… I found 1 Core caused skipping
and other problems with the stream. In UTM you can change the settings
however you like to reduce the burden on your host Mac.</p>

<p><img src="/assets/images/retro-tech/retro-stream-tutorial/050-Debian/19-UTM-Processor.png" alt="UTM System Settings" /></p>]]></content><author><name></name></author><category term="Retro-Tech" /><category term="PowerPC" /><category term="Video" /><category term="FFMPEG" /><category term="Hobby" /><summary type="html"><![CDATA[A tutorial on how to stream YouTube or any other video content to PowerPC Macs using a Linux VM, FFMPEG, and VLC.]]></summary></entry><entry><title type="html">Teskemon: Tailscale Specialist</title><link href="https://jeffburg.com/apps/2025/02/14/Teskemon.html" rel="alternate" type="text/html" title="Teskemon: Tailscale Specialist" /><published>2025-02-14T00:00:00+00:00</published><updated>2025-02-14T00:00:00+00:00</updated><id>https://jeffburg.com/apps/2025/02/14/Teskemon</id><content type="html" xml:base="https://jeffburg.com/apps/2025/02/14/Teskemon.html"><![CDATA[<p><a href="/assets/images/apps/teskemon/01-full.png"><img src="/assets/images/apps/teskemon/01-thumb.png" alt="Teskemon Main Window" /></a></p>

<h2 id="table-of-contents">Table of Contents</h2>

<ul id="markdown-toc">
  <li><a href="#table-of-contents" id="markdown-toc-table-of-contents">Table of Contents</a></li>
  <li><a href="#overview" id="markdown-toc-overview">Overview</a>    <ul>
      <li><a href="#download" id="markdown-toc-download">Download</a></li>
    </ul>
  </li>
  <li><a href="#development" id="markdown-toc-development">Development</a>    <ul>
      <li><a href="#model" id="markdown-toc-model">Model</a></li>
      <li><a href="#controller" id="markdown-toc-controller">Controller</a></li>
      <li><a href="#view" id="markdown-toc-view">View</a></li>
      <li><a href="#privacy" id="markdown-toc-privacy">Privacy</a></li>
    </ul>
  </li>
</ul>

<h2 id="overview">Overview</h2>

<p><a href="/assets/images/apps/teskemon/02-full.png" class="thumbnail"><img src="/assets/images/apps/teskemon/02-thumb.png" alt="Teskemon About Window" /></a>
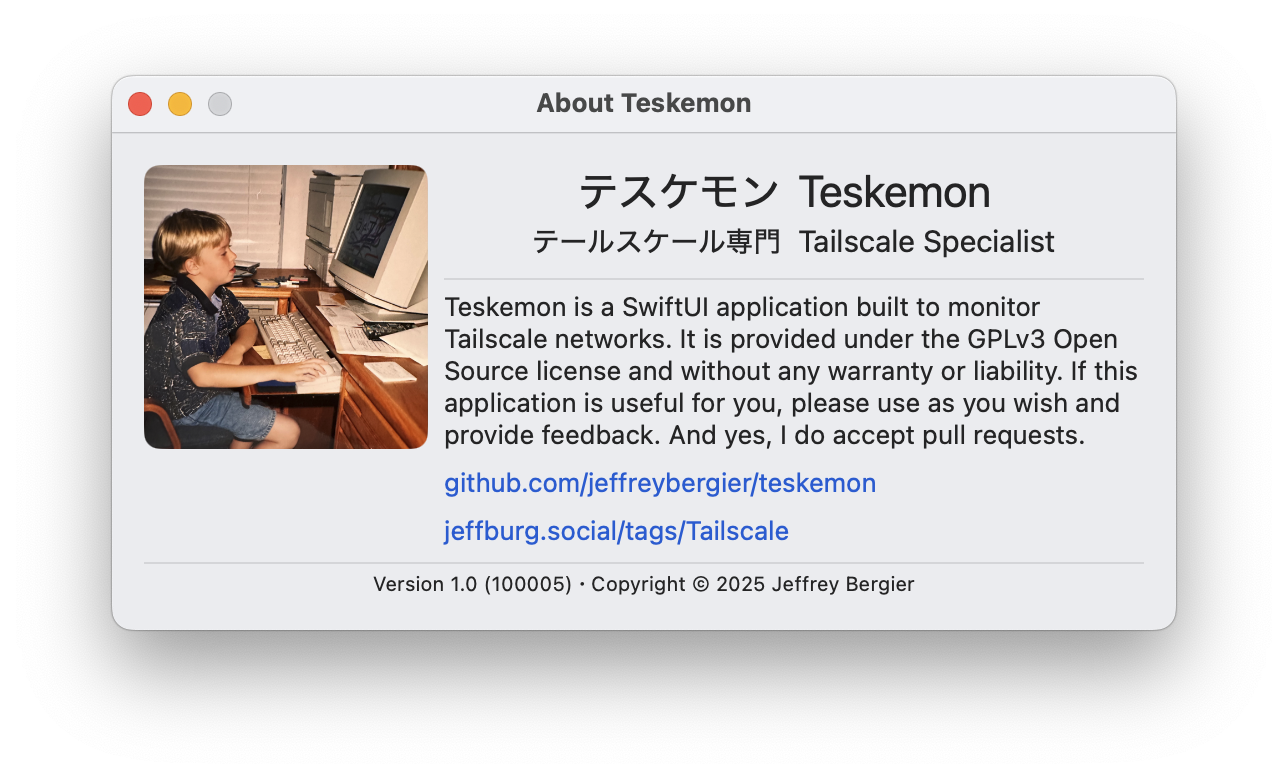
Teskemon is a SwiftUI application built to monitor Tailscale networks. 
It is provided under the <a href="LICENSE">GPLv3 open source license</a> and without any warranty or liability. 
If this application is useful for you, please use it as you wish and provide feedback.
And yes, I do accept pull requests.</p>

<h3 id="download">Download</h3>

<ul>
  <li><a href="https://github.com/jeffreybergier/Teskemon/tree/main/Builds"><i class="fa-regular fa-circle-down"></i>Teskemon Notarized Builds</a></li>
  <li><a href="https://github.com/jeffreybergier/Teskemon/" target="_blank"><i class="fa-brands fa-github"></i>Teskemon Source Code</a></li>
  <li><a href="https://jeffburg.social/tags/Tailscale" target="_blank"><i class="fa-brands fa-mastodon"></i>Teskemon Development Updates</a></li>
</ul>

<p>Requires macOS 14.4 or later because of <a href="https://developer.apple.com/documentation/swiftui/tablecolumnforeach"><code class="language-plaintext highlighter-rouge">TableColumnForEach</code></a></p>

<h2 id="development">Development</h2>

<p>Teskemon was the first app I developed to make heavy use of the new 
<a href="https://docs.swift.org/swift-book/documentation/the-swift-programming-language/concurrency/">Swift Concurrency</a> 
system. Concurrency is used to ping and check open ports on many network
endpoints at once. That said, Teskemon uses a standard (boring) Model View
Controller approach. There are 3 Swift packages: Model, Controller, and View. When I
make big changes I usually post about it on Mastodon. Follow along at
<a href="https://jeffburg.social/tags/Tailscale">jeffburg.social/tags/Tailscale</a> if you
are curious.</p>

<h3 id="model">Model</h3>
<p>Contains all the basic model types and the conversion logic from the JSON
provided by Tailscale <code class="language-plaintext highlighter-rouge">tailscale status --json</code>. These types can all be
considered View Models if you like… they are all meant for the view.</p>

<h3 id="controller">Controller</h3>
<p>Controller contains 3 sets of functionality:</p>
<ol>
  <li>Keychain access logic</li>
  <li>Extension to Process (previously NSTask) to execute the CLI commands
and parse the results. This is all done using <code class="language-plaintext highlighter-rouge">async await</code></li>
  <li>Property Wrappers that wrap the model complexity as well as the Keychain, 
Process, and Presentation complexity into simple types the views can read from
and write to</li>
</ol>

<p>In order to ensure consistency and live updating across all screens all the time,
either AppStorage or SceneStorage are used as an underlying storage primitive.
AppStorage stores settings like custom names and the list of services.
SceneStorage stores temporary information like the list of Machines from
Tailscale, the results of the Service scans, and the presentation state of all
the views.</p>

<h3 id="view">View</h3>
<p>This layer contains all of the views for the application. They are all fairly
simple and mostly consist of Tables or Forms.</p>

<h3 id="privacy">Privacy</h3>
<p>Teskemon does not access the internet or use any analytics service. There is no 
login or other user information stored. The Tailscale CLI does provide your
name, but it is only stored in SceneStorage and never uploaded anywhere. 
Passwords are stored in the keychain but they are cached in memory 
for performance reasons.</p>

<p>That said, Teskemon is not sandboxed because it uses the Process API (previously
NSTask). Because Process allows the application to run any executable on the
machine, it is not possible to use this API in a sandboxed application. Process
is only used to run netcat, ping, and the Tailscale CLI.</p>

<p>Also, if your employer tightly monitors their network, using Netcat 
to port scan a large number of ports on a large number of machines can cause 
warnings to go off (ask how I know). In those cases you may want to disable 
automatic refresh of Services, which is the default setting.</p>]]></content><author><name></name></author><category term="Apps" /><category term="Apps" /><category term="Hobby" /><summary type="html"><![CDATA[In 2024 I started using Tailscale to access my home network remotely. When I noticed Tailscale had a CLI with a JSON interface, I couldn't help myself… I built an app.]]></summary></entry><entry><title type="html">Hipstapaper: Cross Platform Reading List</title><link href="https://jeffburg.com/apps/2017/01/01/Hipstapaper.html" rel="alternate" type="text/html" title="Hipstapaper: Cross Platform Reading List" /><published>2017-01-01T00:00:00+00:00</published><updated>2017-01-01T00:00:00+00:00</updated><id>https://jeffburg.com/apps/2017/01/01/Hipstapaper</id><content type="html" xml:base="https://jeffburg.com/apps/2017/01/01/Hipstapaper.html"><![CDATA[<h2 id="overview">Overview</h2>

<p>Hipstapaper is an app I built for myself to save links to web pages similar to 
Instapaper, which was popular in the early 2010s or so. But as Instapaper was losing
traction, I didn’t want to lose the functionality.</p>

<ul>
  <li>Basic CRUD management of websites</li>
  <li>Tagging, Filtering, Sorting</li>
  <li>Bulk editing</li>
  <li>State restoration</li>
  <li>iPadOS and macOS Menus</li>
  <li>iPadOS and macOS “Scenes” for multiple window support</li>
  <li>Share extension for adding content</li>
  <li>iCloud Sync</li>
</ul>

<h3 id="download">Download</h3>

<p>I never released Hipstapaper on the App Store but you can always use Hipstapaper
on your iOS and macOS devices using the links below:</p>

<ul>
  <li><a href="https://github.com/jeffreybergier/Hipstapaper/tree/main/Releases/macOS"><i class="fa-regular fa-circle-down"></i>macOS Downloads</a></li>
  <li><a href="https://testflight.apple.com/join/V1f2j5Jd"><i class="fa-brands fa-app-store"></i>iOS TestFlight</a></li>
  <li><a href="https://github.com/jeffreybergier/Hipstapaper/"><i class="fa-brands fa-github"></i>Hipstapaper Source Code</a></li>
</ul>

<h3 id="table-of-contents">Table of Contents</h3>

<ul id="markdown-toc">
  <li><a href="#overview" id="markdown-toc-overview">Overview</a>    <ul>
      <li><a href="#download" id="markdown-toc-download">Download</a></li>
      <li><a href="#table-of-contents" id="markdown-toc-table-of-contents">Table of Contents</a></li>
    </ul>
  </li>
  <li><a href="#development" id="markdown-toc-development">Development</a>    <ul>
      <li><a href="#phase-1-2016-2018" id="markdown-toc-phase-1-2016-2018">Phase 1 (2016-2018)</a></li>
      <li><a href="#phase-2-2019-2021" id="markdown-toc-phase-2-2019-2021">Phase 2 (2019-2021)</a></li>
      <li><a href="#phase-3-2022-current" id="markdown-toc-phase-3-2022-current">Phase 3 (2022-Current)</a></li>
    </ul>
  </li>
  <li><a href="#current-status" id="markdown-toc-current-status">Current Status</a></li>
</ul>

<h2 id="development">Development</h2>

<p>Hipstapaper was a learning exercise. I wanted to learn how to make a
cross-platform application that worked on all of Apple’s platforms, including
macOS. This was a big learning opportunity as I had never made an AppKit-based
app before. The TL;DR is that I ended up liking AppKit even more than UIKit and
most of the toy apps I make now are either AppKit or SwiftUI.</p>

<h3 id="phase-1-2016-2018">Phase 1 (2016-2018)</h3>

<p>During this phase, there were no cross-platform UI frameworks from Apple and
there was no database that had online syncing from Apple. Thus the technologies
I chose were not ideal, but they were the only way to get the job done:</p>

<ol>
  <li>Cross-Platform: UIKit and AppKit UI implementations
    <ul>
      <li>Two UI implementations meant everything had to be implemented and updated
 twice. This was a big pain</li>
    </ul>
  </li>
  <li>Realm Database: Realm featured powerful sync capabilities that iCloud could
not match
    <ul>
      <li>Realm was a great database, but it was not the platform standard “Core Data”</li>
    </ul>
  </li>
  <li>Realm Sync Server: Realm-powered server running in Digital Ocean
    <ul>
      <li>Running my own server meant that I would never be able to support users for
 free. So this kept the app limited to my own personal use.</li>
    </ul>
  </li>
</ol>

<h3 id="phase-2-2019-2021">Phase 2 (2019-2021)</h3>

<p>In WWDC 2019, Apple introduced Core Data syncing via CloudKit. While Apple
pitched this as their final solution to Core Data syncing, the actual
<a href="https://developer.apple.com/videos/play/wwdc2019/202">session video</a> they
published was so quick, and so information dense that it was hard to follow.
As well, the feature has fundamental limitations, that I think have prevented
it from being very successful.</p>

<p>But with the introduction of Core Data syncing, I worked on Hipstapaper to
swap out Realm for Core Data. This was no easy task as I had not wrapped
Realm in its own wrapper and Realm headers and tokens needed to be removed
from hundreds of UI files… twice for UIKit and AppKit.</p>

<h3 id="phase-3-2022-current">Phase 3 (2022-Current)</h3>

<p>I wanted to learn SwiftUI and because SwiftUI was finally becoming full-featured
enough to support apps with complex navigation for both iOS and macOS, I decided
to take on the challenge. This required significant updates to the database
wrapper to support SwiftUI’s dynamic data model. However, it worked. I was able
to delete thousands of lines of platform specific UI code and replace it with
just one SwiftUI codebase. As well, I learned to love SwiftUI. If you can figure
out how to let go and let the data drive your application, SwiftUI is simply
amazing. The way it dynamically updates when there are literally hundreds
of database changes happening every second (such as during a sync operation)
is incredible. SwiftUI is truly a game changer.</p>

<h2 id="current-status">Current Status</h2>

<p>I still use Hipstapaper across my devices daily. However, I have never put it 
on the App Store or anything like that as I know it is missing key features
that people will want such as offline reading of webpages. Yes, the link to
the web page is stored offline in the database, but to actually open the web
page you will need an internet connection.</p>]]></content><author><name></name></author><category term="Apps" /><category term="Apps" /><category term="Hobby" /><summary type="html"><![CDATA[Hipstapaper was my very first cross-platform app that works on iPhone, iPad, and macOS]]></summary></entry><entry><title type="html">WaterMe: Gardening Reminders</title><link href="https://jeffburg.com/apps/2016/04/15/WaterMe.html" rel="alternate" type="text/html" title="WaterMe: Gardening Reminders" /><published>2016-04-15T00:00:00+00:00</published><updated>2016-04-15T00:00:00+00:00</updated><id>https://jeffburg.com/apps/2016/04/15/WaterMe</id><content type="html" xml:base="https://jeffburg.com/apps/2016/04/15/WaterMe.html"><![CDATA[<h2 id="table-of-contents">Table of Contents</h2>

<ul id="markdown-toc">
  <li><a href="#table-of-contents" id="markdown-toc-table-of-contents">Table of Contents</a></li>
  <li><a href="#overview" id="markdown-toc-overview">Overview</a>    <ul>
      <li><a href="#app-store-description" id="markdown-toc-app-store-description">App Store Description</a></li>
      <li><a href="#download" id="markdown-toc-download">Download</a></li>
    </ul>
  </li>
  <li><a href="#development" id="markdown-toc-development">Development</a>    <ul>
      <li><a href="#version-1-2016" id="markdown-toc-version-1-2016">Version 1 (2016)</a></li>
      <li><a href="#version-2-2017" id="markdown-toc-version-2-2017">Version 2 (2017)</a></li>
      <li><a href="#version-25-2020" id="markdown-toc-version-25-2020">Version 2.5 (2020)</a></li>
    </ul>
  </li>
  <li><a href="#version-3-and-beyond" id="markdown-toc-version-3-and-beyond">Version 3 and Beyond</a></li>
</ul>

<h2 id="overview">Overview</h2>

<p>WaterMe is the only app that I have released on the App Store that got any sort
of usage traction at all. It doesn’t have a lot of users, but at the time of
this writing (September 2025) it had 993K total sessions according to App Store
Connect analytics. Since these analytics are opt-in I assume that means it’s had
about 3M total sessions… which is still not a lot, but for a nice little hobby
app, I think it’s pretty cool <i class="fa-regular fa-hand-peace"></i></p>

<h3 id="app-store-description">App Store Description</h3>

<p>Never let another plant turn brown again. WaterMe reminds you when to tend to
the plants in your garden:</p>

<ol>
  <li>Add your plants into the app.</li>
  <li>Add reminders for watering, fertilizing, etc.</li>
  <li>Get 1 notification every day reminding you which plants need care.</li>
  <li>Take care of the plant in real life.</li>
  <li>Drag and drop the reminder to mark it as complete.</li>
</ol>

<p>That’s it! Every day you’ll get one, and only one, notification that reminds you
to take care of your plants.</p>

<ul>
  <li>Supports multiple kinds of reminders per plant
    <ul>
      <li>Water, Fertilize, Trim, and more</li>
    </ul>
  </li>
  <li>Easy to see which plants need to be taken care of and when.</li>
  <li>Syncs data across all of your iOS devices via iCloud.</li>
  <li>Supports working quickly with the Drag and Drop interface.</li>
  <li>Customize the time notifications are sent every day.</li>
  <li>Care for your garden with your voice using Siri Shortcuts.</li>
  <li>Tip Jar In-App Purchases allow you to directly support the development of WaterMe.</li>
  <li>Supports Split Screen and Slide Over iPad Multitasking.</li>
  <li>Supports Dynamic Type.</li>
  <li>Supports Voiceover and other iOS accessibility features.</li>
</ul>

<h3 id="download">Download</h3>

<ul>
  <li><a href="https://apps.apple.com/us/app/waterme-gardening-reminders/id1089742494" target="_blank"><i class="fa-brands fa-app-store"></i>App Store</a></li>
  <li><a href="https://github.com/jeffreybergier/WaterMe/" target="_blank"><i class="fa-brands fa-github"></i>WaterMe Source Code</a></li>
  <li><a href="https://bitbucket.org/saturdayapps/waterme/" target="_blank"><i class="fa-brands fa-bitbucket"></i>WaterMe Source Code (Outdated)</a></li>
</ul>

<h2 id="development">Development</h2>

<p>WaterMe was the first ever app I wrote that is 100% a <a href="https://en.wikipedia.org/wiki/Create,_read,_update_and_delete">CRUD</a> 
app. It’s just a database app with a pretty user interface placed on top of it.
I also got help from a designer friend to make the watering animation video as
well as the icon. It’s written entirely in Swift and UIKit but has gone through
a lot of iterations over the years.</p>

<h3 id="version-1-2016">Version 1 (2016)</h3>

<p>The original version of WaterMe was extremely simple and the Core Data model was
simple to match. You had a plant with a name, photo, last watered date, and
watering interval. The app would then sort and categorize them as needing
“Water Today”, “Water Tomorrow”, or “Water Later.” As this was in the days of iOS
10, the user interface was also extremely simple.</p>

<table>
  <tbody>
    <tr>
      <td><a href="/assets/images/apps/waterme/v1/01-full.png"><img src="/assets/images/apps/waterme/v1/01-thumb.png" alt="WaterMe v1 Screenshot 1" /></a></td>
      <td><a href="/assets/images/apps/waterme/v1/02-full.png"><img src="/assets/images/apps/waterme/v1/02-thumb.png" alt="WaterMe v1 Screenshot 2" /></a></td>
      <td><a href="/assets/images/apps/waterme/v1/03-full.png"><img src="/assets/images/apps/waterme/v1/03-thumb.png" alt="WaterMe v1 Screenshot 3" /></a></td>
      <td><a href="/assets/images/apps/waterme/v1/04-full.png"><img src="/assets/images/apps/waterme/v1/04-thumb.png" alt="WaterMe v1 Screenshot 4" /></a></td>
      <td><a href="/assets/images/apps/waterme/v1/05-full.png"><img src="/assets/images/apps/waterme/v1/05-thumb.png" alt="WaterMe v1 Screenshot 5" /></a></td>
    </tr>
  </tbody>
</table>

<h3 id="version-2-2017">Version 2 (2017)</h3>

<p>This version was a major rewrite where I updated the data model to be more
sophisticated. In v2.0, the data model included a hierarchy that allowed each
plant to contain multiple reminders each of which had their own watering
history. Each plant and each reminder also had a type. For reminders, this
resulted in watering, trimming, or other. But for the plant this field remains
unused. But I added it so that theoretically types could be added for other
household reminders like clothes or something.</p>

<p>This update took advantage of the new drag and drop support that was
added in iOS 11 to make it possible to perform multiple reminders at once.
Lastly, I changed the database to Realm in the hopes that I could one day
add multi-device syncing.</p>

<table>
  <tbody>
    <tr>
      <td><a href="/assets/images/apps/waterme/v2.0/01-full.png"><img src="/assets/images/apps/waterme/v2.0/01-thumb.png" alt="WaterMe v2.0 Screenshot 1" /></a></td>
      <td><a href="/assets/images/apps/waterme/v2.0/02-full.png"><img src="/assets/images/apps/waterme/v2.0/02-thumb.png" alt="WaterMe v2.0 Screenshot 2" /></a></td>
      <td><a href="/assets/images/apps/waterme/v2.0/03-full.png"><img src="/assets/images/apps/waterme/v2.0/03-thumb.png" alt="WaterMe v2.0 Screenshot 3" /></a></td>
      <td><a href="/assets/images/apps/waterme/v2.0/04-full.png"><img src="/assets/images/apps/waterme/v2.0/04-thumb.png" alt="WaterMe v2.0 Screenshot 4" /></a></td>
      <td><a href="/assets/images/apps/waterme/v2.0/05-full.png"><img src="/assets/images/apps/waterme/v2.0/05-thumb.png" alt="WaterMe v2.0 Screenshot 5" /></a></td>
    </tr>
  </tbody>
</table>

<h3 id="version-25-2020">Version 2.5 (2020)</h3>

<p>This version brought few UI changes, but completely changed the database under
the hood. In 2019 with iOS 13, Apple released
<a href="https://developer.apple.com/documentation/coredata/nspersistentcloudkitcontainer"><code class="language-plaintext highlighter-rouge">NSPersistentCloudKitContainer</code></a> 
which allowed syncing Core Data reliably via CloudKit. I really wanted to
provide syncing to my users so I started the process of swapping the database
layer. This involved writing a wrapper for Realm and Core Data so the UI would
not know the difference. As well, I had to write a one-time migration capability
that would do the terrifying work of performing the migration.</p>

<p>At this time I also added error reporting using a hacked together (but free)
system built with AWS Simple Email Service. It would just send a JSON payload to
AWS Lambda, and that would use the Simple Email Service to email me the errors.
This way I would know if the database migrations were failing.</p>

<table>
  <tbody>
    <tr>
      <td><a href="/assets/images/apps/waterme/v2.5/01-full.png"><img src="/assets/images/apps/waterme/v2.5/01-thumb.png" alt="WaterMe Screenshot 1" /></a></td>
      <td><a href="/assets/images/apps/waterme/v2.5/02-full.png"><img src="/assets/images/apps/waterme/v2.5/02-thumb.png" alt="WaterMe Screenshot 2" /></a></td>
      <td><a href="/assets/images/apps/waterme/v2.5/03-full.png"><img src="/assets/images/apps/waterme/v2.5/03-thumb.png" alt="WaterMe Screenshot 3" /></a></td>
      <td><a href="/assets/images/apps/waterme/v2.5/04-full.png"><img src="/assets/images/apps/waterme/v2.5/04-thumb.png" alt="WaterMe Screenshot 4" /></a></td>
      <td><a href="/assets/images/apps/waterme/v2.5/05-full.png"><img src="/assets/images/apps/waterme/v2.5/05-thumb.png" alt="WaterMe Screenshot 5" /></a></td>
    </tr>
  </tbody>
</table>

<h2 id="version-3-and-beyond">Version 3 and Beyond</h2>

<p>In 2024, I worked on a new version of WaterMe with an all new UI in SwiftUI.
I created it to actually make an Apple Watch version of the app. It’s mostly
complete but other projects caught my interest and I have yet to finish and
release it. I would also like to reuse the UI for the iPhone version as I really
dislike working in UIKit. However, I am not sure if I will get the interest
again to do this work.</p>

<p>I am at a crossing point where I could just let WaterMe fade away due to updates
needed for Liquid Glass or inevitable future changes, or I could keep working
on it. We shall see I suppose.</p>]]></content><author><name></name></author><category term="Apps" /><category term="Apps" /><category term="Hobby" /><summary type="html"><![CDATA[WaterMe was my first app that was 100% a CRUD app and has been on the App Store since 2016.]]></summary></entry><entry><title type="html">Change Management Rapid Prototype</title><link href="https://jeffburg.com/design/2016/01/01/Change-Management.html" rel="alternate" type="text/html" title="Change Management Rapid Prototype" /><published>2016-01-01T00:00:00+00:00</published><updated>2016-01-01T00:00:00+00:00</updated><id>https://jeffburg.com/design/2016/01/01/Change-Management</id><content type="html" xml:base="https://jeffburg.com/design/2016/01/01/Change-Management.html"><![CDATA[<h2 id="the-project">The Project</h2>
<p>One of the main problems network operators have is managing change on their network. The problem is change commonly breaks things, so the established rule is to change as little as possible as rarely as possible. I wanted to try something better: where all changes can be seen, where approvals can be granted, and where accountability is clear.</p>

<hr />

<h3 id="change-timeline">Change Timeline</h3>
<p><a href="/assets/images/design/change-management/cm-now-2k.png" class="thumbnail"><img src="/assets/images/design/change-management/cm-now-600.png" alt="Change Timeline" /></a>
Given a time period, the operator should be able to see when changes were saved in the system. They should also be able to see who made the changes and what changes were made. Also, depending on how the Role Based Management system works, changes might need to be submitted for approval before being put into effect. This is shown in the middle of this mockup.</p>

<h3 id="new-changes">New Changes</h3>
<p><a href="/assets/images/design/change-management/cm-newchanges-2k.png" class="thumbnail"><img src="/assets/images/design/change-management/cm-newchanges-600.png" alt="New Changes" /></a>
Another really important feature of a change management system is rolling out changes to affected hardware. This does not happen instantly. It also needs to be scheduled as there are “maintenance windows” that can vary from location to location. In the mockup above, the time between starting a rollout to finishing it is shown in light gray. At the end, the operator would be able to click on that and get a status report on how the rollout went. Where did it fail and why?</p>

<h3 id="summary-of-changes">Summary of Changes</h3>
<p><a href="/assets/images/design/change-management/cm-changes-2k.png" class="thumbnail"><img src="/assets/images/design/change-management/cm-changes-600.png" alt="Summary of Changes" /></a>
This mockup and the previous one both show what it could look like when a different operator makes a change and it appears in the timeline for this operator to see. This operator can click on the event on the timeline to see what was changed. Depending on how Role Based Management is configured, an operator may need to approve the changes before a rollout can be started.</p>

<h3 id="full-diff">Full Diff</h3>
<p><a href="/assets/images/design/change-management/cm-diff-2k.png" class="thumbnail"><img src="/assets/images/design/change-management/cm-diff-600.png" alt="Full Diff" /></a>
It may be necessary to dive deep into the changes made. This could be changes made in the past, or changes that have not yet been rolled out. This is a concept screen showing Application definition changes. This also features my favorite pet feature, impact. Impact shows the network admin approximately how many sites, users, etc this change will affect when it is rolled out.</p>

<h3 id="pixel-perfect-mockup">Pixel Perfect Mockup</h3>
<p><a href="/assets/images/design/change-management/cm-visual-2k.png" class="thumbnail"><img src="/assets/images/design/change-management/cm-visual-600.png" alt="Pixel Perfect Mockup" /></a>
All the mockups up to this point were done super quickly in Balsamiq. Rapid prototypes like this are not worth spending a lot of time on until you know the idea is worth investigating. After I made these basic mockups, the rest of the UX team thought it looked concrete enough to make a pixel perfect mockup. This mockup is the same timeline. I love seeing the transformation of a structural idea, into something that is just as useful, but also pleasing to the eye.</p>]]></content><author><name></name></author><category term="Design" /><category term="Design" /><category term="Professional" /><summary type="html"><![CDATA[What if global network configuration was more like Git?]]></summary></entry><entry><title type="html">Rule Icon System</title><link href="https://jeffburg.com/design/2016/01/01/Rule-Icon-System.html" rel="alternate" type="text/html" title="Rule Icon System" /><published>2016-01-01T00:00:00+00:00</published><updated>2016-01-01T00:00:00+00:00</updated><id>https://jeffburg.com/design/2016/01/01/Rule-Icon-System</id><content type="html" xml:base="https://jeffburg.com/design/2016/01/01/Rule-Icon-System.html"><![CDATA[<h2 id="the-project">The Project</h2>
<p>Network devices have many rules in them. Generally, these rules are painstakingly typed in via command line. They need to be deployed to every device on the network manually. If a rule that is shared on 1,000 devices needs to be changed, it needs to be changed 1,000 times. The goal with this project was to explore what a ‘global’ view of network rules would look like. Could a rule be made once and instantly applied everywhere? But more importantly, how could a network admin troubleshoot rules and see the effect of rules on their network?</p>

<h3 id="authors-note">Author’s Note</h3>
<p>Normally, it’s really scary to share Balsamiq mockups because they don’t look refined. But I love this project because it highlights how visual hierarchy and white space are more important to an understandable design than really polished artwork. This icon system could be implemented in any design style and it would still work.</p>

<hr />

<h3 id="intent-based-policy-rules">Intent Based Policy Rules</h3>
<p><a href="/assets/images/design/rule-icon-system/is-contents-2k.png" class="thumbnail"><img src="/assets/images/design/rule-icon-system/is-contents-600.png" alt="Intent Based Policy Rules" /></a>
These are a tiny number of slides from a large slide-deck I put together. I was exploring “intent based policy rules.” The goal of these rules is to apply broad policy across a global network from a central management console. On this page, I’m focusing more on the visual system I designed for these rules, rather than the rules themselves.</p>

<h3 id="visual-cues">Visual Cues</h3>
<p><a href="/assets/images/design/rule-icon-system/is-visuals-2k.png" class="thumbnail"><img src="/assets/images/design/rule-icon-system/is-visuals-600.png" alt="Visual Cues" /></a>
This slide describes, in text, what the user is meant to see and how. Each rule has set icons for the various kinds of objects the rule can encompass. It also states that horizontal spacing is important. These icons should line up when rules are placed vertically on top of one another.</p>

<h3 id="single-rule">Single Rule</h3>
<p><a href="/assets/images/design/rule-icon-system/is-breakdown-2k.png" class="thumbnail"><img src="/assets/images/design/rule-icon-system/is-breakdown-600.png" alt="Single Rule" /></a>
Three slides that go through every possible icon that can be on every rule and explain what they all represent. I think the coolest part of each rule is the success indicator on the bottom. Network admins tell us over and over that “right now” status is useless to them. They need to see the status of everything over time.</p>

<h3 id="rules-table">Rules Table</h3>
<p><a href="/assets/images/design/rule-icon-system/is-list-2k.png" class="thumbnail"><img src="/assets/images/design/rule-icon-system/is-list-600.png" alt="Rules Table" /></a>
This is the rules table where all the rules get stacked together. This slide attempts to highlight the importance of the vertical alignment. Because the icons are always aligned, it is really easy to glance through the rules and see which rules affect which parts of the network and what kind of actions the rules are performing on the network. Also, because of the “success” indicator, it is easy to see which rules are doing well and when.</p>

<h3 id="impact">Impact</h3>
<p><a href="/assets/images/design/rule-icon-system/is-impact-2k.png" class="thumbnail"><img src="/assets/images/design/rule-icon-system/is-impact-600.png" alt="Impact" /></a>
Rules can affect Sites, Users, and Applications. However, not all rules affect all of those things and even if they do, they may affect 1 user or 10,000 users. Impact is a concept that attempts to quantify how many of each of these subjects are affected by a rule. It also shows how that changes over time. This is incredibly useful for what network administrators call “change management.” If a rule only affects 10 users, it’s easy to change or delete. If a rule affects 10,000 users, more work needs to be done before changing it.</p>

<h3 id="qos-action">QoS Action</h3>
<p><a href="/assets/images/design/rule-icon-system/is-qos-2k.png" class="thumbnail"><img src="/assets/images/design/rule-icon-system/is-qos-600.png" alt="QoS Action" /></a>
Each rule can have one of many actions applied to it. QoS is one of those actions; it’s also my <a href="/design/2014/01/01/QoS.html">party trick</a> because I’ve spent so much time on it. This slide shows how QoS can be applied in a rule.</p>]]></content><author><name></name></author><category term="Design" /><category term="Design" /><category term="Professional" /><summary type="html"><![CDATA[At a glance view of all the rules that affect a user's global network.]]></summary></entry></feed>